

We’ve made payments event easier with one checkout form for the whole group!
This new function is available only in our group style systems and now it’s even easier for groups to register and pay seamlessly.

If you’re not familiar with our group style registration systems, read more here.
Group systems can be used to administer group training sessions or courses, camps for all ages, and can even be used for internal uses such as vendor management or billing.
Here’s the gist of what’s new:
When registering, users will create as many profiles as they need to. When they’re done, all payments due based on the selections of each individual profile can be paid for all together!
From the dashboard, users can view their group balance, view payment plans for each individual profile, and add / remove payments they’d like included in today’s payment.
Here’s a quick view from the front end:
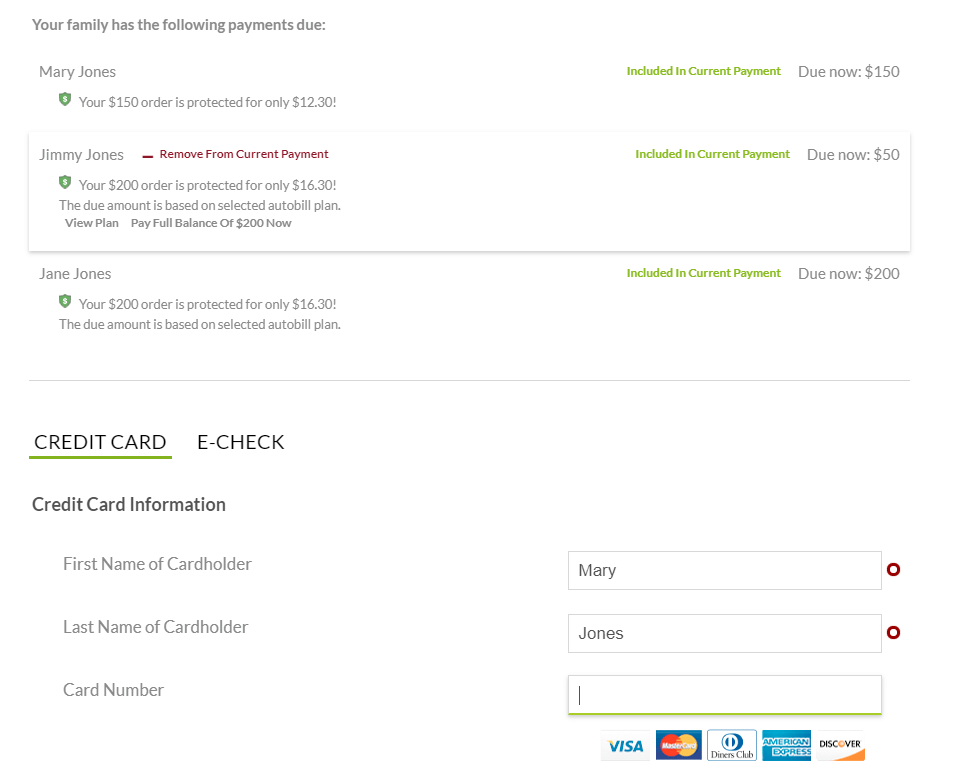

As you can see, the checkout form now shows the list of all payments due for everyone in the group as well as the amount to be collected in today’s payment.
All payments are included for this payment, however users do have the option to remove any of the payments from their order.
Any payments listed that are on an autobill plan, will also have the option to view all payments in the plan, and close the full balance in one payment, if desired.
The balance to be paid today will update automatically as the user adds, removes, or changes the payments to be paid.
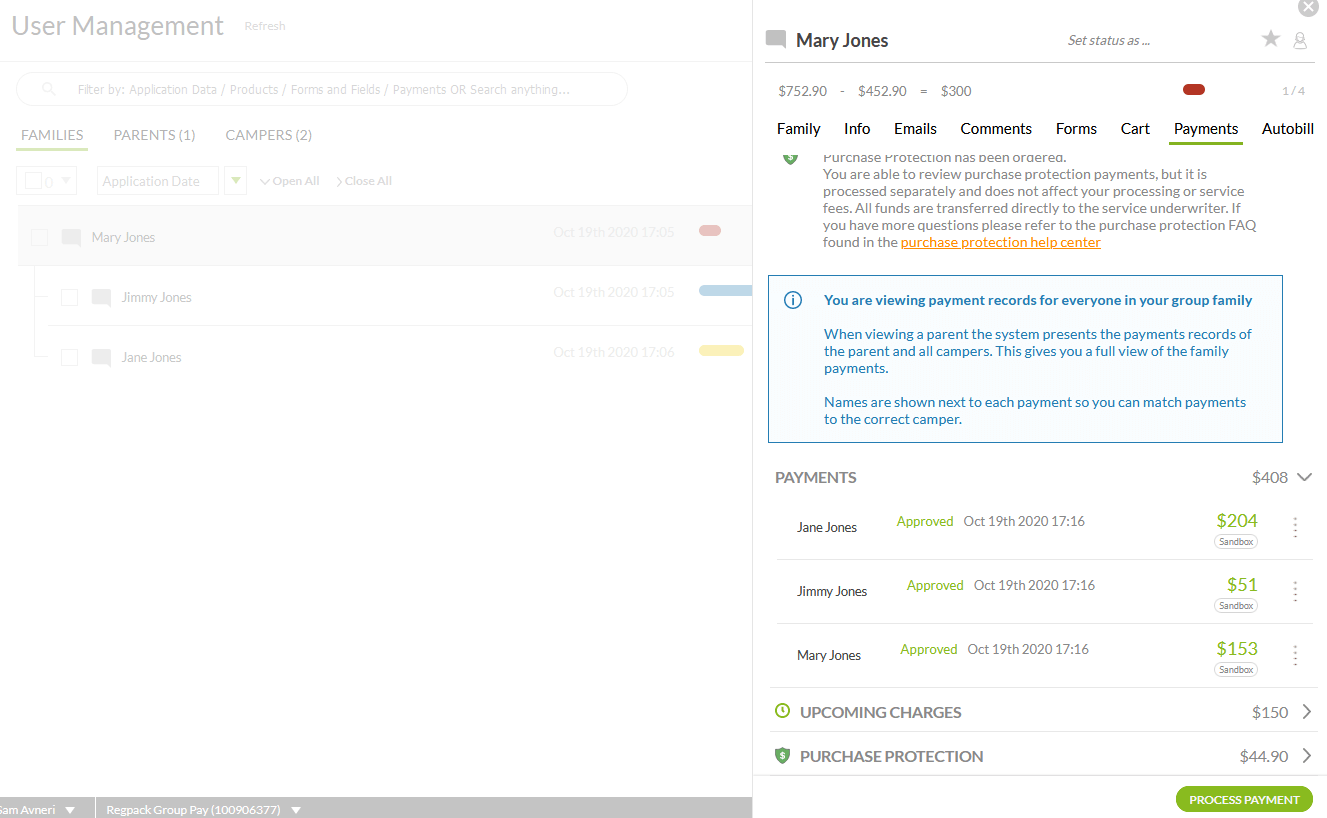
On the back end, you’ll be able to view all payments, including upcoming charges, for the group under the head-unit, as well as all sub-unit payments under their profile.

This update makes it as easy as possible for you to get paid while providing an even more seamless payment experience!
How can I enable Group Pay?
You don’t have to do anything! Read the details here.
By default, the checkout form will show all payments due for the group, and the user can decide which users they’d like to pay for.
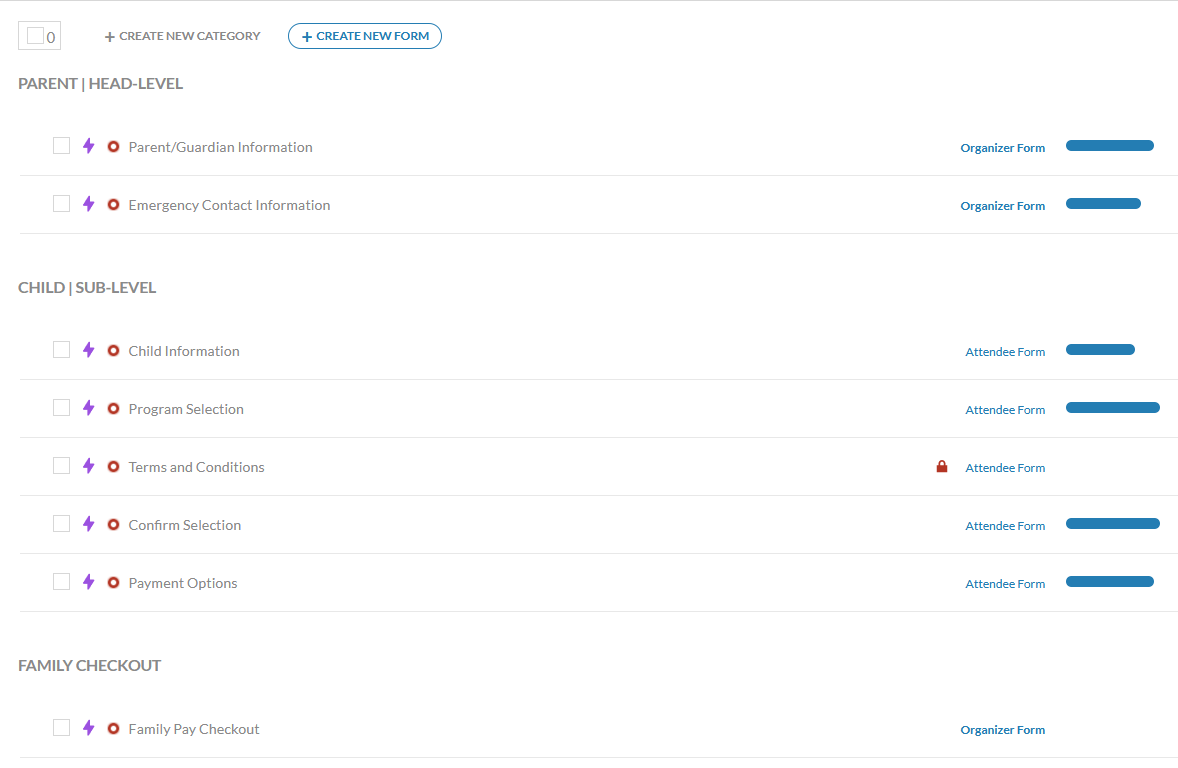
The optimal setup to streamline the sub-unit registration is to place the checkout form on the head-unit level and not on the sub-unit level.
Here’s a good example of the form setup:
Notice that the parent level forms appear first, then the child level forms, and finally the group checkout form – which is on the head level.
This means the registration flow will go from parent forms, to child forms (as many times as there are children), followed lastly by the checkout form where the head unit can review and pay for all the sub-units in the account.