


Designing a structure for your online course can be a daunting and overwhelming task.
You may have a great idea or a helpful skill you’re dying to teach — but moving from an idea to a full, enriching online course can feel like crossing an impossibly wide chasm. A course outline is one of the most crucial elements you can create for your online class.
Designing your course without an outline is like beginning a journey without a map.
In this post, we’ll cover the basics of an online course structure, from the fundamentals of the outline to the essential steps of designing an unforgettable course. We’ll even teach you how to set it up once it’s ready for the public.
Jump to Section
What Is a Course Outline
Why Create a Course Outline
10 Tips for Structuring Great Online Courses (+ Bonus Tip)
Ways to Set up Your Online Course
What Is a Course Outline?
A course outline is similar to a syllabus in your university classes: it lists the topics the class covers and the overarching course goals. While they have some common characteristics, an online course outline is somewhat different from a traditional university course syllabus. This is mostly because in-person classes rely on guidance from professors which allows for a more free-flowing structure.
An online course, on the other hand, lends itself to easy confusion on the students’ part if not carefully structured.

Because of this, online course outlines need to be clear and give a complete birds-eye view of the course structure from the outset.
The key to creating an effective online course outline is to make it simple, clear, and easy to understand.
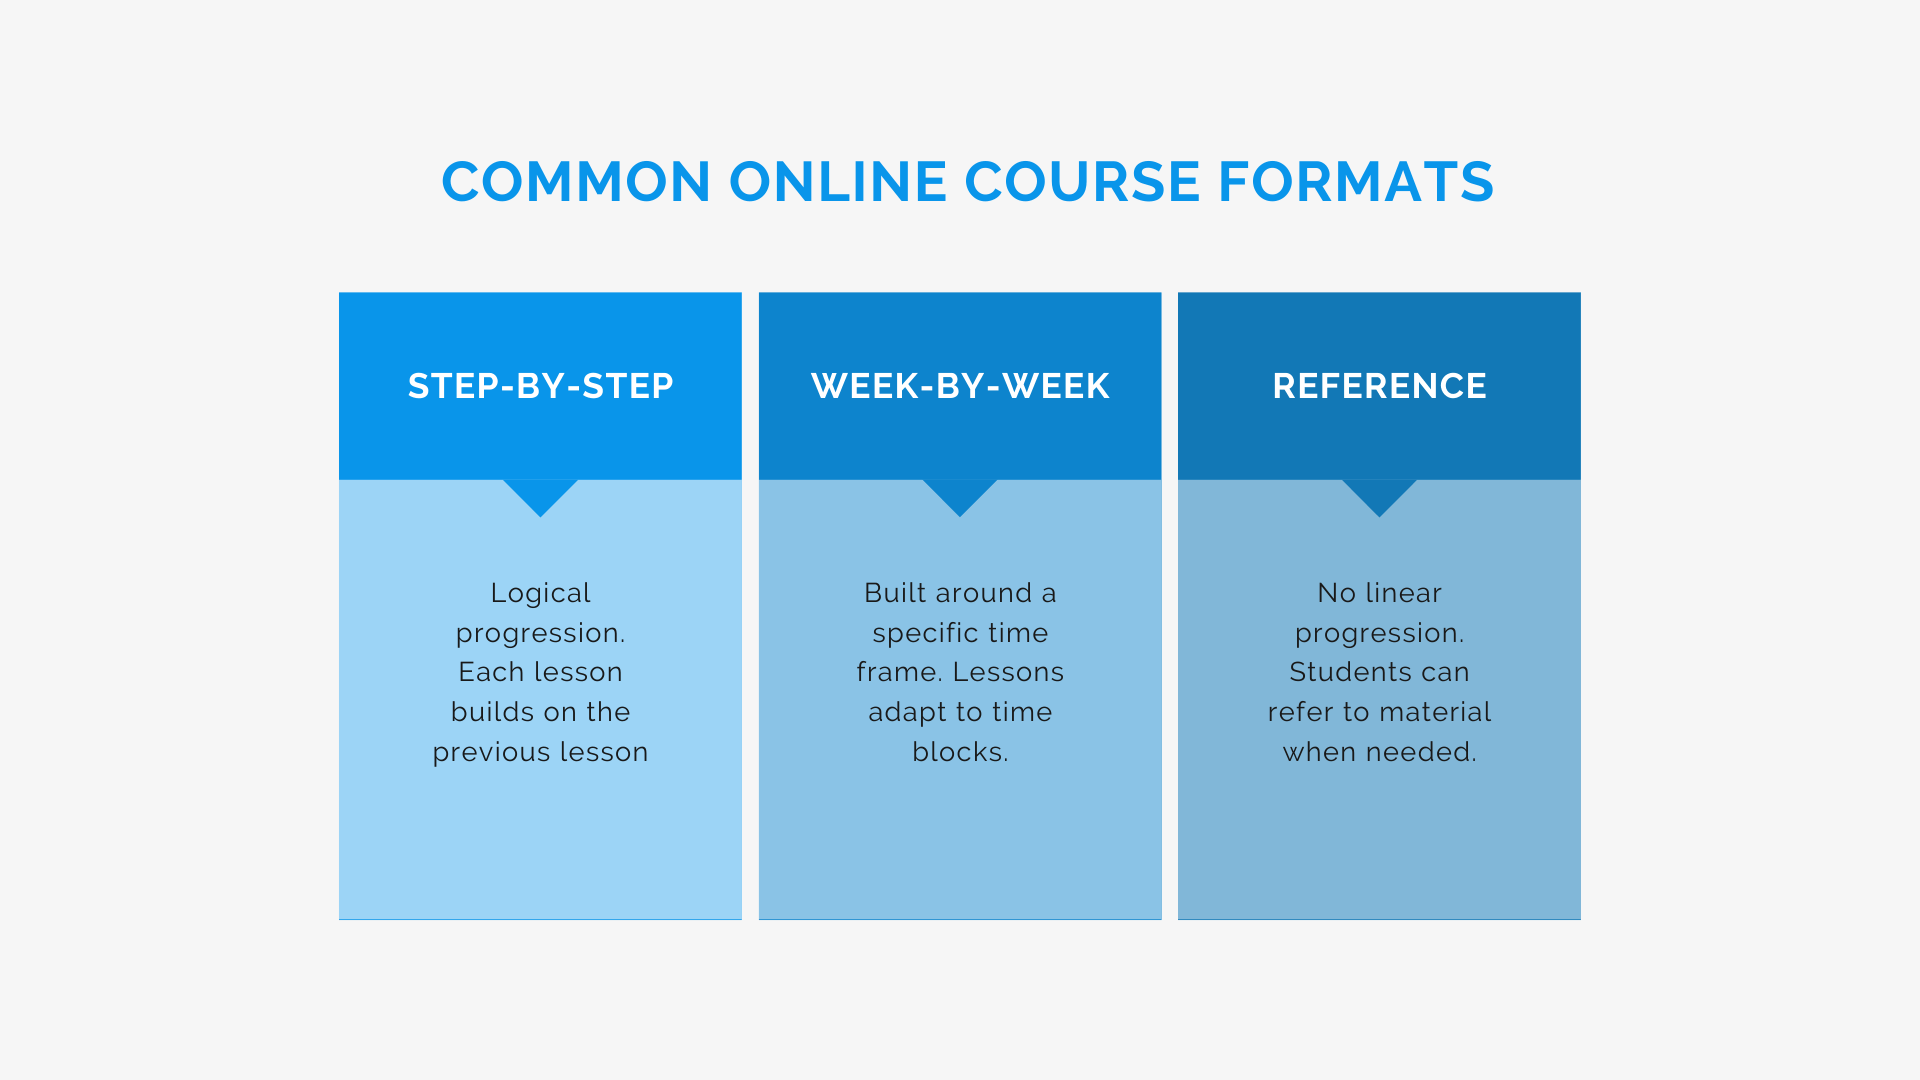
Online courses generally follow one of a few format options, such as:
– Step-by-Step: This format is the most common because it follows a logical progression from beginning to end, where each lesson builds on the previous lesson. These types of courses are usually planned by working backward from the end goal of the course.
– Week-by-Week: Although similar to the step-by-step method, this format is built around a specific time frame. If your class is designed to last 8 or 12 weeks and your audience has two time slots available every week, you’ll need to fit your lesson sequence and achieve your learning objectives in those blocks.
– Reference: Courses like these don’t have a linear progression. Instead, they are a well-organized collection of material that the student can refer to as needed, at their own pace.
Why Create a Course Outline?
A course outline is an essential tool both for the instructor and the student. When planning the class, you’ll need to start with a comprehensive outline to refer back to; otherwise, you will find it difficult to have a functional grasp of your learning objectives, benchmarks, and topic schedule as the course progresses.
It enables you to group related topics, not to mention see the order in which topics need to be addressed.
Starting with an outline helps you create the course more efficiently.
As for the student population, having a clear syllabus is a roadmap, helping them understand the end goal and the skills they’ll develop on the journey.
10 Tips for Structuring Great Online Courses (+ Bonus Tip)
Creating a great online course comes down to starting with a great plan, as we’ve mentioned. First, you’ll need to sit down and map out all your ideas and goals. Then, turn those ideas and goals into a bulletproof outline.
The outline accounts for each step along the way to your goal, complete with material formats, lesson structures, and how you’ll measure your students’ success as they progress through the course.
Each step listed below covers the most important factors to keep in mind as you create your own online course structure.


Your Courses Matter, So Does Your Cash Flow
See How Efficient Registration Affects Cash Flow!
1. Design It Backward: Begin With the End in Mind
One of the best approaches to course design is to start with the desired outcome. While we tend to think of courses as being focused on covering content, what you should really start with are your students’ learning objectives.
That is the way to ensure you’re imparting something useful and long-lasting. Think of it as working backward from the end.
- What goal do you have for the course?
- Will your students learn a specific skill or develop an understanding of a broader topic?
Beginning with the end in mind and reverse-engineering your course outline makes sure your course has no unnecessary fluff—without skipping anything essential.
2. Choose the Best Way to Present Your Content
Once you’ve outlined your steps from beginning to end, decide on a format for presenting your course content. There are several options, each of which is best suited to a certain type of material.
- Combination of Text and Photos: Traditional text and photo format remains an effective teaching method for visual learners, ideal for complex content.
- Audio: Audio clips enhance retention, offering a personal touch when paired with text.
- Video: This format is favored for its personal touch, skill demonstration, and near-in-person class experience.
- Slides: Combine video with slides for complex topics to aid visual learners without losing personal engagement.
- Screencasting: Screen recording with narration suits tech skill courses, allowing real-time action demonstration for easy follow-along.
- Interactive Elements and Quizzes: Incorporate interactive elements like games and quizzes for dynamic learning and retention testing.
- Workbooks and Resource Materials: Provide supplemental PDFs or bonus materials as durable references to reinforce and extend learning beyond the course.
3. Group Similar Tips Into Modules
Designing an online course can be an overwhelming process, which is why it’s helpful to divide it up into parts. Your students will also be able to follow your course more easily if it’s broken down into a few digestible components.
These parts are called modules. Each module can be further broken down into individual lessons (which can be divided even further into topics, if needed).
Using the modular method helps you keep your course organized and consistent.
Try to structure each module roughly similarly.
For instance, if your first module includes an introductory course, the learning objectives, a few lessons, and a review quiz, you should structure the rest of your modules the same way. This helps give your students an idea of what to expect as they move through the course.
4. Order and Outline Your Lessons
While creating your online course structure, it’s essential to go ahead and outline each lesson—even if it’s only for your own benefit.
First, make sure each lesson is in the proper module and that they are ordered the way you want them. Then, decide on a flow that each lesson will follow.
For instance, you might choose the following template:
- Introduction
- Content
- Summary
- Learning resources or bonus materials
- Practice activities/quiz
Likely, the version of the syllabus you share with your students won’t include lesson outlines. However, knowing the details of the information contained in each lesson will guide you when creating the content material for your course.
5. Create Specific Learning Outcomes
Having a clear understanding of your goal from the beginning will help you design an outline that matches your marketing, meaning your student performance will be met as they work through the course. Specific learning outcomes are also part of professional standards for university, corporate, and government course outlines.
When deciding on your learning objectives for the course, make sure to focus on quantifiable outcomes.
Use language that describes:
- What new knowledge the student will come away with, or
- What new skills the student will master.
When designing these outcomes, educators usually rely on Bloom’s Taxonomy, which helps define what the students will be able to do in different learning stages with precision. Also, notice that the acceptable objective above focuses on the student’s skills, not the instructor’s actions.
Good learning objectives set benchmarks for students to meet.
6. Make Your Lectures Short
We live in a fast-paced digital world, and your students’ attention spans are best suited to short lectures, whether they be video, audio, or blocks of text.
Not only are your full-time students likely busy individuals juggling your course lessons alongside full-time work or caring for their families, but science indicates that people understand and retain information better when it’s divided into small chunks.

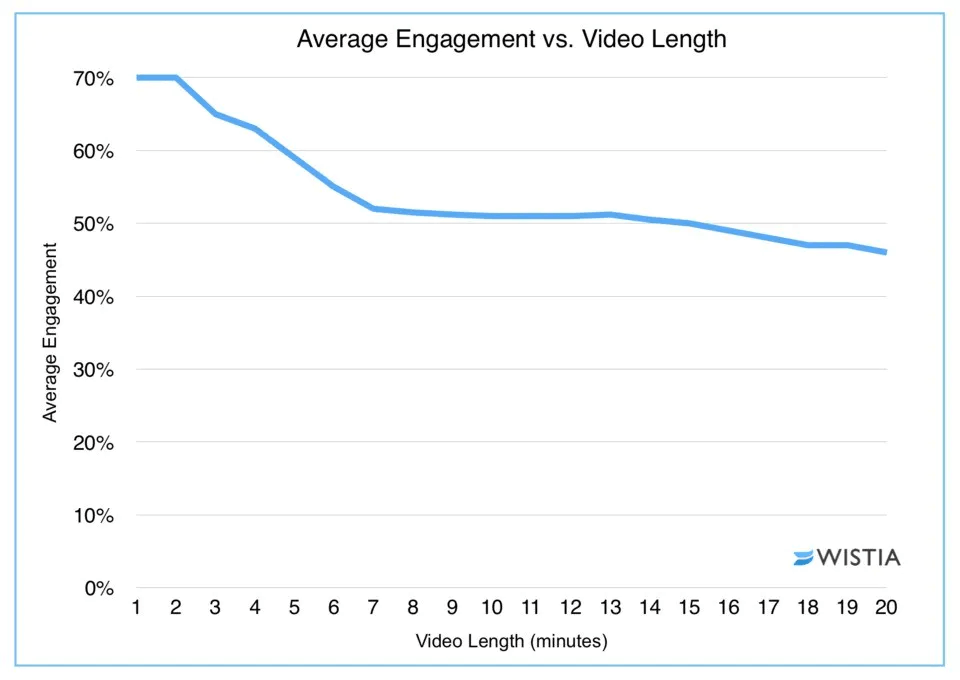
Source: Wistia
This also helps to avoid fatigue. As a general rule, each lesson should be bite-sized in length and easy to digest in a single sitting. Try to keep your lessons between 5 and 15 minutes in length.
7. Highlight Student Progress
Remember that your course’s success will depend largely on student satisfaction, which means that their success in reaching the learning outcomes should matter to you.
Your goal should be to help your students feel excited to move forward instead of making their lessons feel like a chore.
It’s a great idea to build regular check-ins into your course outline, including:
- “Congratulations!” messages at the end of each module
- Reminders of the material they’ve learned so far
- Encouraging messages motivating them to continue to the next stage
If possible, design your course so that students can’t “fail”; instead, the lessons should build on each other and guide the students through the course at their own pace.
8. Have Compelling Lesson Titles
The titles for your lessons (and the course as a whole) matter to prospective students.
Which one sounds more compelling: “Crocheting Tips” or “How to Crochet Like a Pro in 10 Simple Steps”?
You’d probably be drawn to the second title because it suggests a clear end goal (“Crochet Like a Pro”) with a promise of quick fulfillment (“10 Simple Steps”), rather than the vague suggestion of giving you some tips on crocheting.

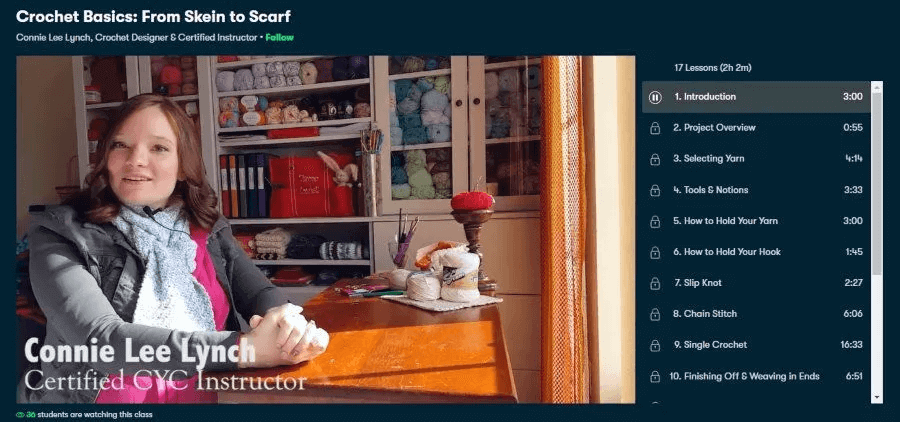
Source: Skillshare
It’s the same with lesson titles. A prospective student looking on your course’s landing page will be curious about the contents of the course—so if the lesson titles don’t give a good idea of the value offered in each lesson, the individual probably won’t be too motivated to pay for the course.
Check out this article from the eLearning Industry for more course titling ideas.
9. Make It Interactive
One of the best ways to ensure maximum student engagement and retention is to keep them interacting with the materials.
The more you can keep students from being passive observers, the better.
Interaction with the course material has several benefits, including:
- Enhancing your students’ interest in the material
- Letting them practice the lessons they’re learning in real time
- Reflecting reality through simulations
- Creating an active learning experience
Interactive elements will make your lessons more engaging, and your students will feel like they’re getting more value for their money.

Course Registration That Gets You Paid On Time, Every Time
Increase Your Cash Flow By 35%!
10. Backup the Lesson and Make It Stick
When designing your lessons, thinking of ways to make them stick in your students’ minds should be a priority.
Simply presenting the content isn’t enough; your students need a way to move the information from short-term to long-term memory.
Think outside the box and present additional resources (like infographics, reference guides, cheat sheets, etc.) or practice activities at the end of each course section. Another way to make each lesson stick in your students’ minds is to keep it relevant to them throughout.
Consider letting students reinforce the lessons they’re learning by engaging with each other in regular dialogues. To support discussion amongst your students (past and present), consider setting up a Facebook group or some other forum uniquely reserved for them.
Bonus Tip: Use Engagement Amplifiers
Did you know that at least 90% of people who purchase an online course never complete it?
If you want your students to follow through with the material and actually gain new skills or knowledge, you’ll need to implement a few tricks to keep them motivated.
That’s where engagement amplifiers come in.
Engagement amplifiers do what they sound like: they increase your students’ engagement using some basic psychological tricks.
Focus on building a community around your course (for example, in your private Facebook group) and letting your students encourage and motivate each other. That way, they can share questions, struggles and give feedback as they progress through the course.
Here’s a preview of a private group for course customers from Content Sparks.


Consider gamifying your course with badges, points, or contests. Offer special prizes or certificates only available once they finish the course.
Ways to Set up Your Online Course
Someone who plans to sell an online course at scale will need to have an instructional strategy in place for handling the many administrative tasks that pop up once the course goes live, like registration, billing, onboarding forms, and customer communication tools.
There are three main ways most course creators sell their online courses:
1. Online Course Marketplaces
An online course marketplace is a giant catalog that houses many different courses. The marketplace’s subscribers browse the marketplace and choose to purchase one that appeals to them.
If you don’t have a huge online presence or marketing strategy yet, an online course marketplace may give you the most eyes on your product—but be prepared to hand over a percentage of your sales to the platform.
2. Learning Management System (LMS)
Learning management systems are software programs designed for a large-scale setting, usually either in a school or in a business for training employees.
While they can be beneficial if you’re looking for a way to house, design, and track your employee training courses, they will probably fail to meet your needs if you want to sell a course online.
3. Course Creation Software
If you’re serious about making a profit from selling professional-level courses online, this is likely the option for you.
Course creation software lets you customize your content delivery, landing pages, and marketing.
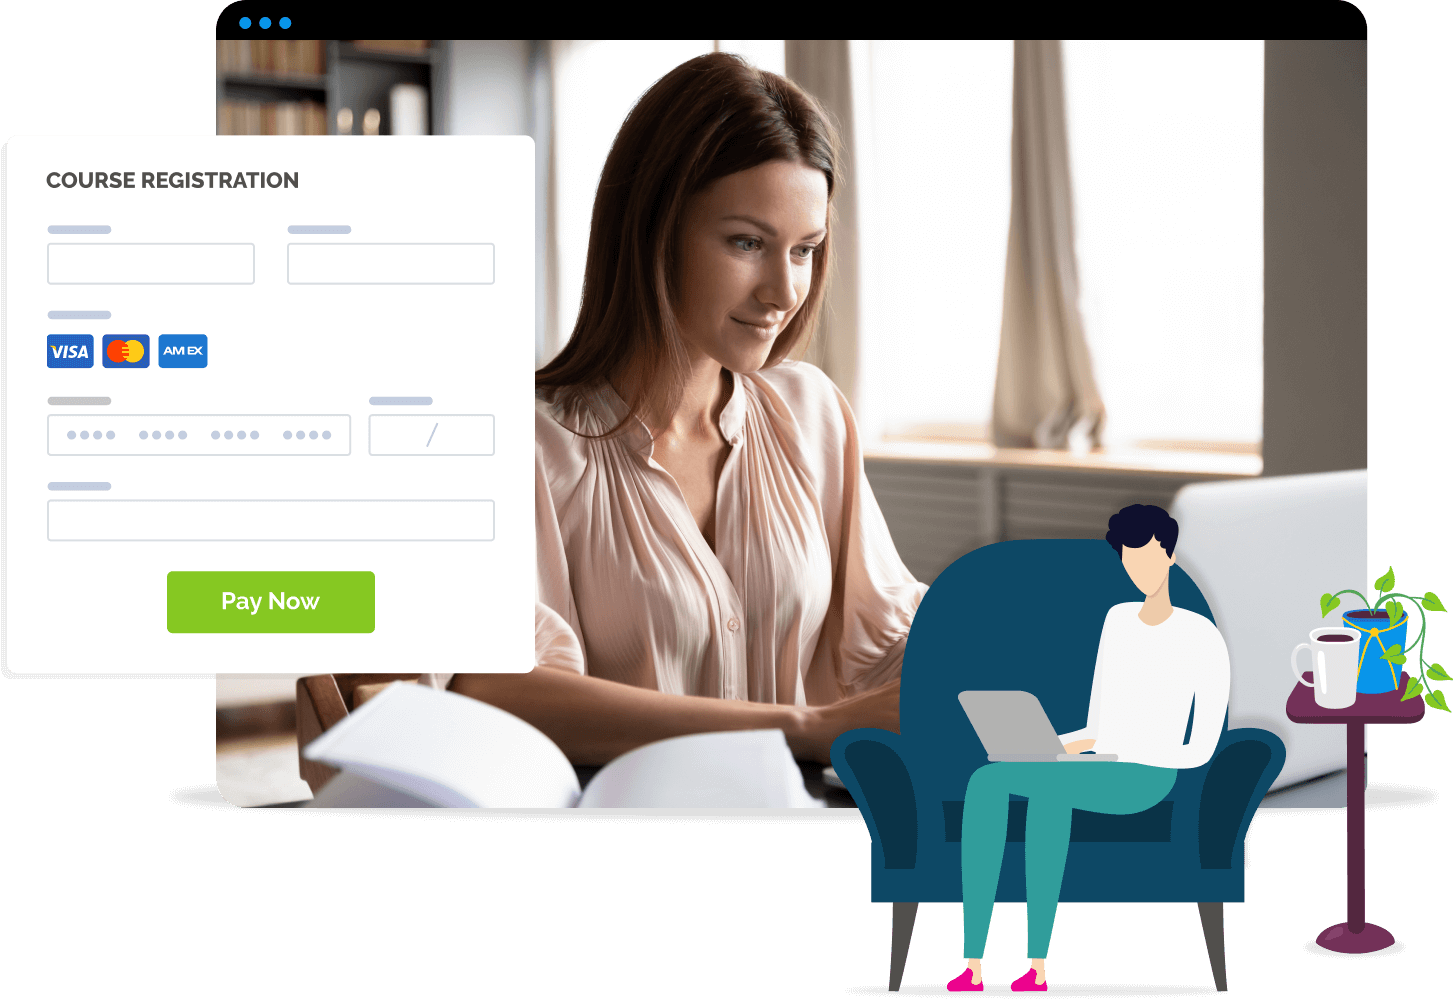
You can sell courses from your own website and register users with software like Regpack, which comes with additional benefits like automating student registration and payment, as well as marketing tools.
Course Registration Shouldn’t Be Complex
Simplify Your Process, Raise Your Cash Flow!
Online Course Structure: It’s All About Intentional Design
It is both exciting and overwhelming to design an online course from scratch.
You’ll need to invest a great deal of time, planning, and execution to put together something that provides value and results for your students.
But if you begin with the end in mind, organize your course into logical components, work from specific learning objectives, and find ways to keep your students engaged and progressing, you’ll be on your way to a highly successful course in no time! Regardless of whether you are creating courses for first-year, second-year, or third-year students, undergraduate courses, elective courses, or core courses, a well-structured and efficient outline can contribute to the successful completion of the course.