


As your business grows, manually handling all the invoices from one-time and repeat customers can quickly overwhelm your staff, leading to billing errors, unsatisfied customers, and late payments.
That’s why businesses increasingly opt to automate their customer registration, billing, and payment processing operations by setting up an automated billing system.
Although this process can present some challenges, the benefits of automated billing far outweigh any issues that might arise during the system setup.
Against this background, here are six steps—plus helpful tips—you can take to set up automated billing for your business.
- Find the Right Automated Billing Software
- Integrate the Solution With Existing Software
- Create a New Autobill Plan
- Set up Electronic Invoicing
- Schedule Billing Reminders
- Launch a Customer Payment Portal
- Conclusion
Find the Right Automated Billing Software
Naturally, finding the right software is the essential first step your business needs to take to automate the billing process.
Automated billing software solutions come in various shapes and sizes, and the sheer number of them offered online can make your head spin with all the different features and options your business may or may not need.
Therefore, before starting your search, you and your team should review your business’s internal workflows and determine the biggest pain points in your current billing process.
To illustrate, here are some examples of such billing issues:
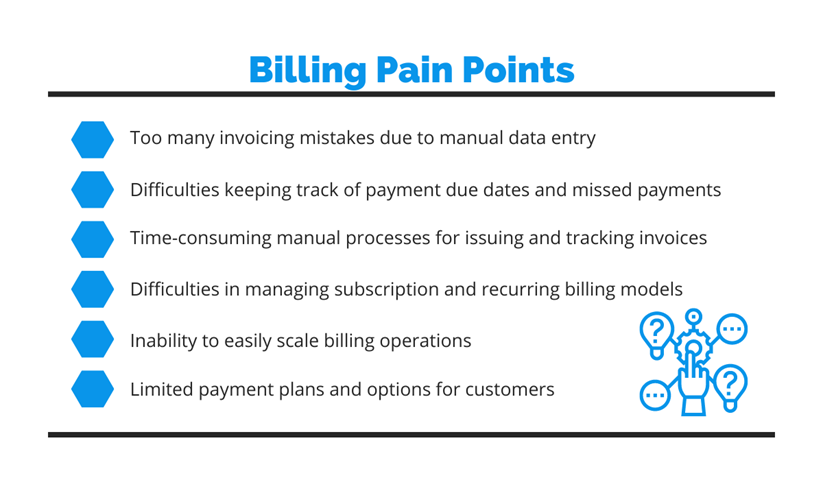

Source: Regpack
Of course, you might identify other friction points, such as a lack of billing transparency and an inability to automate payment collection or set automatic payment reminders.
Armed with insights from your billing workflow review, you can now move to researching industry-specific automated billing solutions.
More specifically, automated billing software is generally better suited for businesses that primarily sell services or subscriptions, while e-commerce platforms might better fit companies that sell physical goods.
In any case, to address the above-mentioned and other weaknesses of the billing process, you should look for the following key features your automated billing software should have:


Source: Regpack
Since you can learn more about each feature in our above-linked article, here’s just a quick rundown.
Automated invoicing refers to the software enabling you to automatically generate digital invoices and send them to customers by email.
Likewise, recurring billing refers to the software helping you automate repetitive billing tasks related to customers charged regularly (i.e., customers with a subscription/installment plan).
Other features include providing customers with multiple online payment methods (credit or debit card, bank transfer, automated clearing house (ACH) payment, etc.), allowing them to pay in their own currency, and securely processing their payments.
The analytics and reporting feature allows you to gain valuable insights from the data collected in the software’s database.
As for the last two features on our list—integrations and reminders—they’re explained here under steps two and five.
In summary, finding the right automated billing software is the crucial first step that should include identifying your billing pain points, followed by researching which solutions provide the key features that enable you to address them efficiently.
Integrate the Solution With Existing Software
Once you select, purchase, and deploy the automated billing software of your choice, you should integrate it with your business’s other software solutions.
Simply put, integrating two software solutions makes real-time data synchronization between them possible.
This means that when specific data is recorded by one software, the other one is automatically updated, thereby reducing the need for your staff to manually do so to keep your records across different systems up to date.
Naturally, you might want to integrate various software programs with your automated billing software, such as customer relationship management (CRM), project management (PM), or marketing automation software.
However, the most typical—and important—candidate for such integration is accounting software, such as QuickBooks.


Source: QuickBooks
For example, every time your customers make payments, automated billing software will update QuickBooks, thus simplifying payment tracking and reconciliation.
As for how integrations are done, most software solutions will offer an open application programming interface (API) that enables seamless communication between two software programs.
Such an API will allow your IT staff to integrate the automated billing system with other software and enable two-way communication based on requests one solution makes to another.
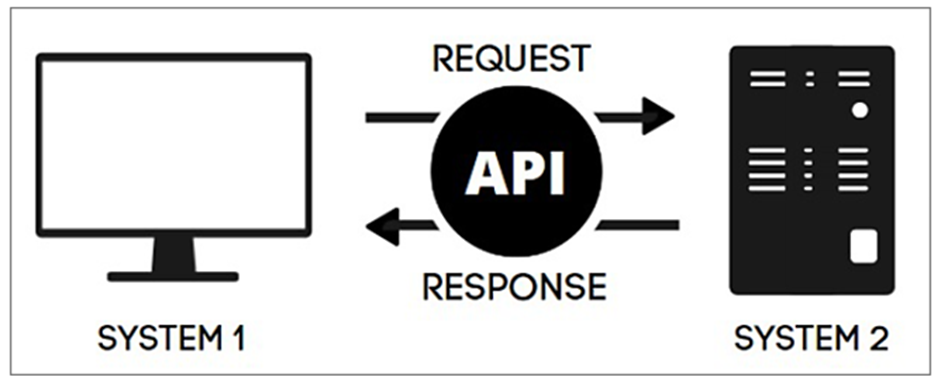

Source: Geeks for Geeks
Another practical API subtype is webhooks, which enable automatic notifications from one system to another in real time when a specific event occurs.
For instance, if a customer misses their payment, a webhook set in your automated billing software will notify your accounting software.
APIs and webhooks are essential for automating your billing operations across different software tools, which saves time and minimizes errors that might occur due to one or more systems not having the latest data.
Finally, it’s worth noting that you can skip or postpone some integrations and rely on data exports between two solutions.
However, just like manual data entry, that process can be time-consuming if data formats are incompatible or disarrayed.
To recap, integrating your automated billing solution with existing software is the second step in automating your billing processes that enable real-time data synchronization between them, ensuring your data is updated across different systems.
Create a New Autobill Plan
The third step in setting up an automated billing system is to create a new autobill plan, which is a set of rules defining when and how your customers will be billed.
More specifically, you’ll need to define the amount to be charged, the frequency of the charge, and the billing cycle duration for each service and product your business offers.
The autobill setup process may differ depending on your chosen automated billing platform, so there is no “one-size-fits-all” procedure.
That’s why we’ll use our automated billing software, Regpack, as an example.
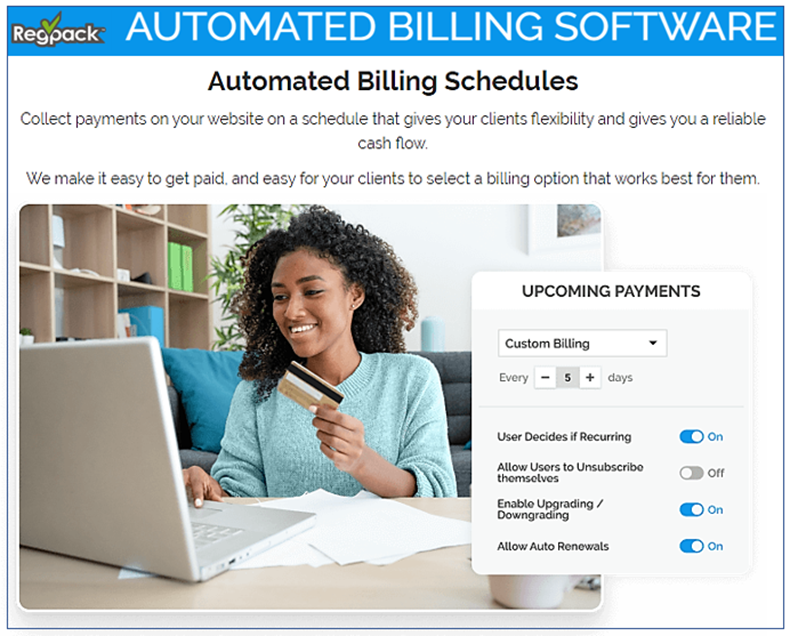

Source: Regpack
As you can see, Regpack allows you to set different parameters for your online payment plans and automates billing, invoicing, and payment processing operations from that moment forward.
To create an autobill plan in Regpack, you would go to “Create a New Autobill Plan” and then to “Plan Settings,” where you would define the plan’s name and category.
For example:
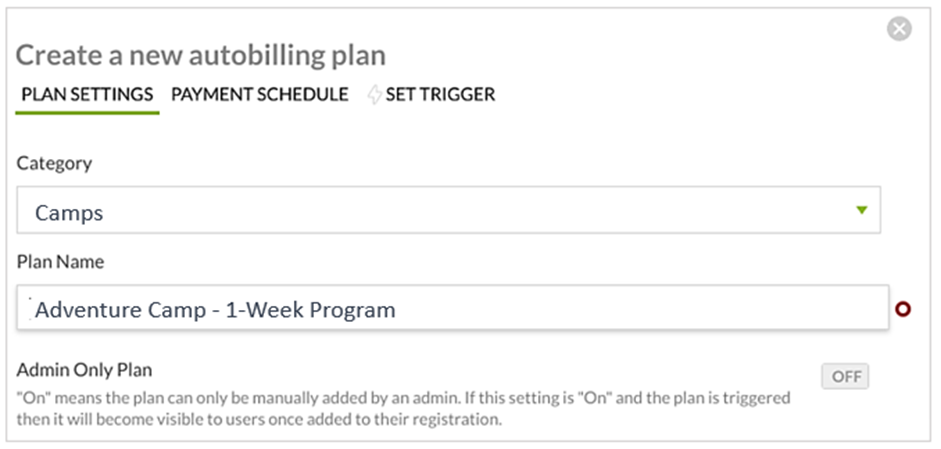

Source: Regpack
Then, you would determine whether you want the plan to be “admin-only” (for manually adding custom payment plans to individual users) or “user-facing,” which allows your customers to select the payment plan they prefer.
Additionally, you would select whether the autobill plan will apply to a customer’s entire order or only to specific products/services.
In the latter case, multiple autobill plans will be automatically combined into a single plan that applies to the customer’s entire order.
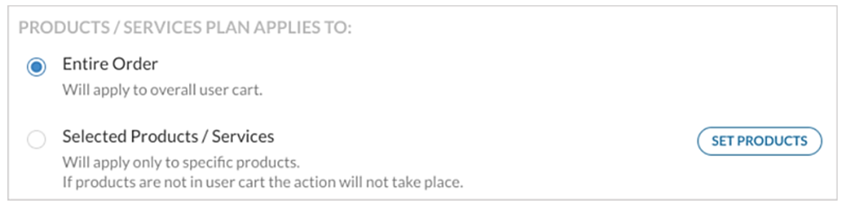

Source: Regpack
From there, you would move to defining the payment schedule, i.e., when the initial and last payment should be made, along with deposit options (if any), the number of payments, and dates/periods when a customer will be charged (subscription/installment plan).
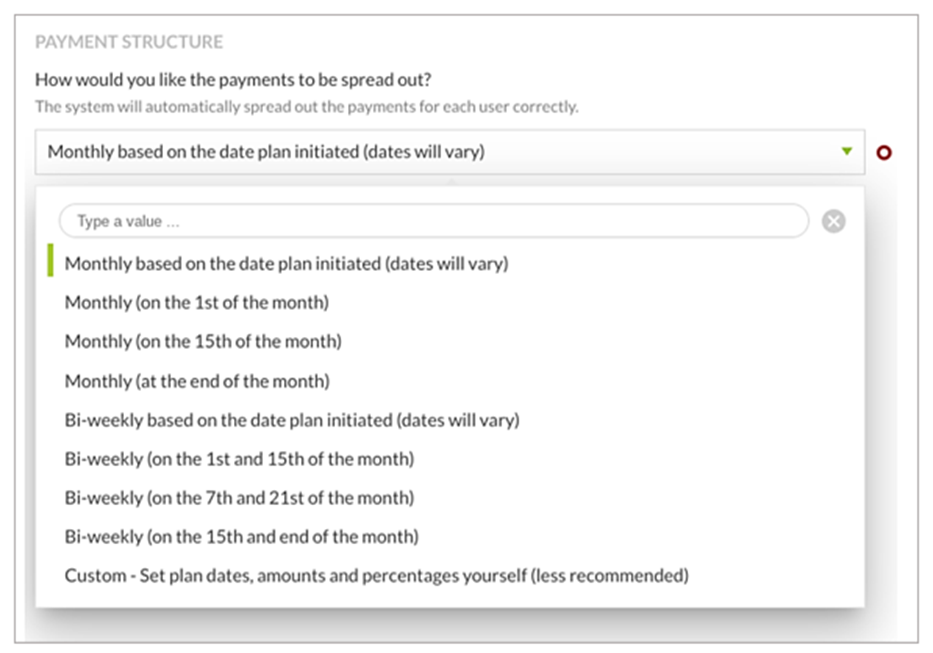

Source: Regpack
And that’s it, your autobill plan is set.
Now your customers can choose their preferred payment schedule—and later the payment method—which gives them the ultimate shopping convenience and can drive up your sales.
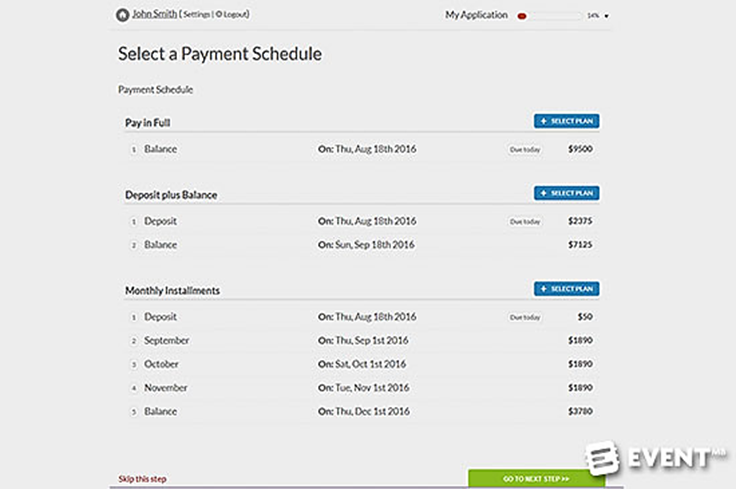

Source: Regpack
Once a customer has enrolled in an autobill plan, Regpack will use the billing parameters you set to charge them automatically at predetermined intervals.
This autobilling feature provided by Regpack allows customers to choose what billing frequency best fits their needs, while Regpack’s payment processing feature allows them to select their preferred payment method, resulting in a seamless user experience.
On the business side, you don’t have to worry about when each customer needs to be invoiced and charged since Regpack does that for you.
In fact, Regpack’s users have reported a 75% decrease in late payments and a 25% jump in their cash flow.
Overall, creating new autobill plans is essential in automating your billing for both sides, giving your customers the convenience they’ve come to expect from online shopping and automating administrative work for your staff.
Set up Electronic Invoicing
The next step in automating your billing is to set up electronic invoicing, which means digital invoices will be automatically generated and sent directly to customers by email.
But before we explain how you can do that, let’s briefly turn to why your business should do that.
In a nutshell, electronic invoicing will replace many manual invoicing tasks, such as creating recurring invoices, sending them to customers, and then tracking when they will be paid.
Suffice it to say, manually doing these tasks is time-consuming, resource-intensive, and error-prone.
Conversely, when invoicing is automated with the help of your billing software, this process takes much less time, doesn’t require additional resources (just the opposite), and minimizes invoicing errors, which are the main source of late payments and payment disputes.

Source: Regpack
Now, let’s turn to how electronic invoicing works.
Basically, once a new customer buys something from your business and decides to subscribe to your service or pay for it in installments, your billing system will provide an invoice template that can be easily populated with all the necessary data.
Then, depending on their chosen payment frequency, billing software will automatically generate a new invoice for that customer and send it to them when the system detects their recurring payment was processed.

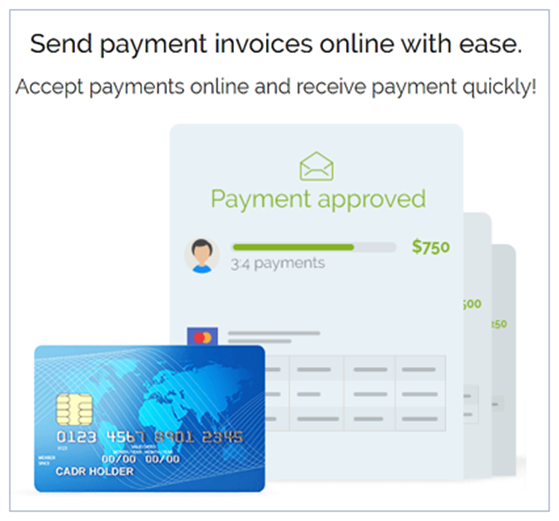
Source: Regpack
Such payment-triggered invoice emails will be sent automatically, each providing a full summary of the customer’s payment.
Here’s an example.


Source: Regpack
Naturally, you can also design these invoices to include your business’s branding.
In summary, electronic invoicing replaces many manual billing processes, minimizes errors, and saves time and efforts typically associated with sending recurring invoices and tracking payments, which makes it a vital step in automating your billing operations.
Schedule Billing Reminders
So, your automated billing is basically set up, your payment terms are defined, invoices are sent on time, and the system will track when they’re paid.
However, customers may still not pay their invoices on time for any reason, be it because their credit/debit card expired without them noticing, they forgot, or they have financial issues.
That’s why it’s important to do this step, i.e., schedule billing reminders.
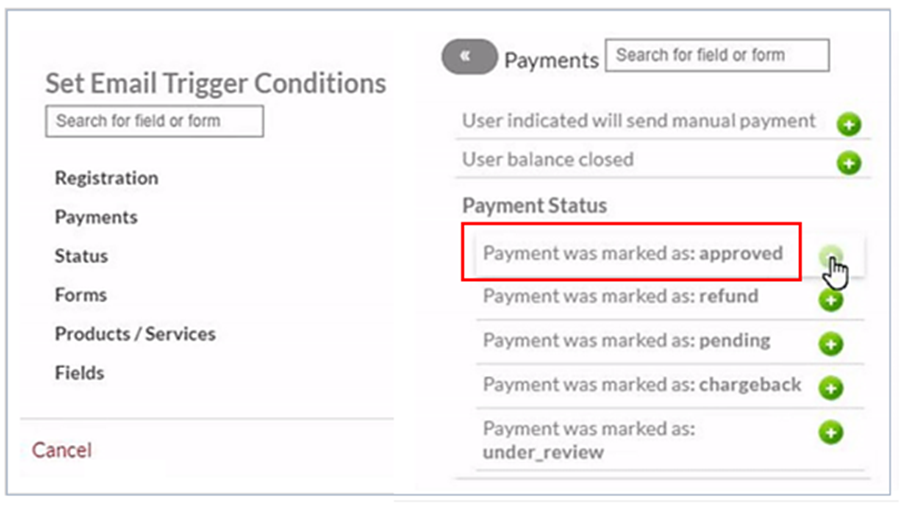
Therefore, your automated billing software should enable you to set different email reminders in advance and automate them to be sent at particular points in time.
For instance, you can choose to send an upcoming payment reminder one week before the customer’s payment is due and then another one on the last day their payment is due, like in this example.
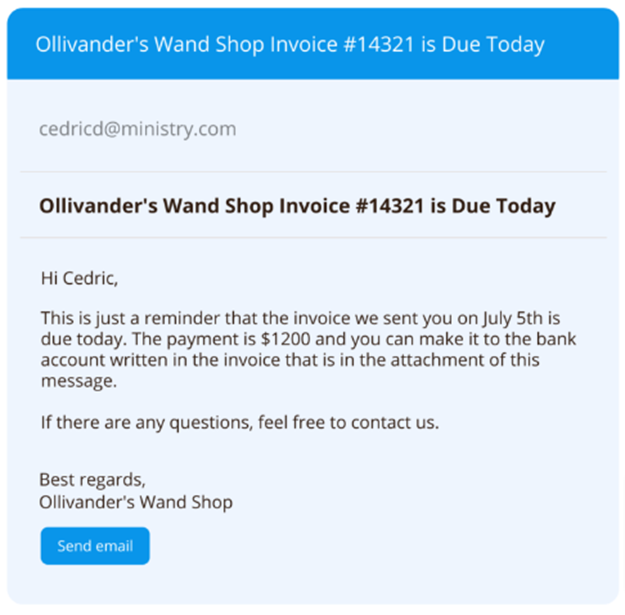

Source: Regpack
Of course, there still might be customers who ignore or simply forget their payment obligation, so you can also automate overdue payment emails to be sent one week after the email above, then two weeks after, and so on.
Whatever frequencies you select for these dunning email reminders, your automated billing system will enable you to schedule them ahead of time, thus doing this often-unpleasant job for you.
Therefore, scheduling billing reminders is another practical step that helps you chase down overdue payments by ensuring reminders are delivered to customers on time so that you can collect your payments faster.
Launch a Customer Payment Portal
The final step in setting up automated billing is launching a customer payment portal.
This customer-facing self-service portal allows customers to track due dates, pay invoices online using their preferred payment method, download invoices, and update their payment information.
The best option is when your automated billing system allows you to customize this portal with your branding and embed it directly on your website.
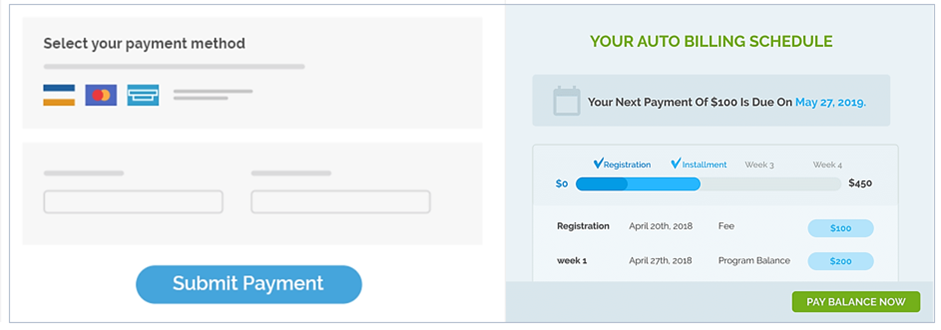

Source: Regpack
Long story short, such a portal provides customers with the convenience of:
- securely paying online using their preferred payment method
- checking payment due dates and their user account’s balance
- viewing and/or downloading invoices
- updating their payment information (e.g., new credit card number)
And they can do all this by themselves, i.e., without contacting your customer service, which makes this step the pinnacle of payment automation.
All in all, launching a customer payment portal is the final step that completes your automated billing system by allowing your customers to easily pay their invoices and manage other billing details.
Ultimately, this increases the number of timely paid invoices and frees time for your staff to focus on more complex billing and payment issues.
Conclusion
So, we covered the steps typically needed to set up automated billing for your business, from finding the right software solution to launching a self-service portal for your customers.
Ultimately, after your billing system is set up, automated, and integrated with other systems, you’ll reap benefits such as improved billing accuracy, time savings, enhanced user experience, and increased cash flow.