


You may be a brilliant event planner—but does even the idea of setting up an event registration page give you a headache?
You’re not alone.
Thankfully, you don’t have to be a professional coder to create a reliable registration page for your next event.
In this article, we’ll walk you step-by-step through the process of setting one up.
- Identify the Target Audience for Your Event
- Compare Different Event Registration Software Tools
- Create an Account With Your Chosen Provider
- Set Up Your Event Project
- Set Up Your Merchant Account
- Publish Your Event Page
- Promote Your Event
- You’re Ready to Set up an Event Registration Page!
Identify the Target Audience for Your Event
It’s essential to start with the knowledge of who will be buying tickets to your event.
How old are they, for instance? Do they likely have a few demographic characteristics in common, like gender, occupation, income level, or hobbies?
Do your best to create an ultra-specific audience persona that lets you get into the head of your target audience.
In addition to the age and the gender, you can give this persona a name and imagine what sort of job they may be doing.
The more you can picture this person as real, the easier it will be to create an event strategy and registration page that appeal to people like them.
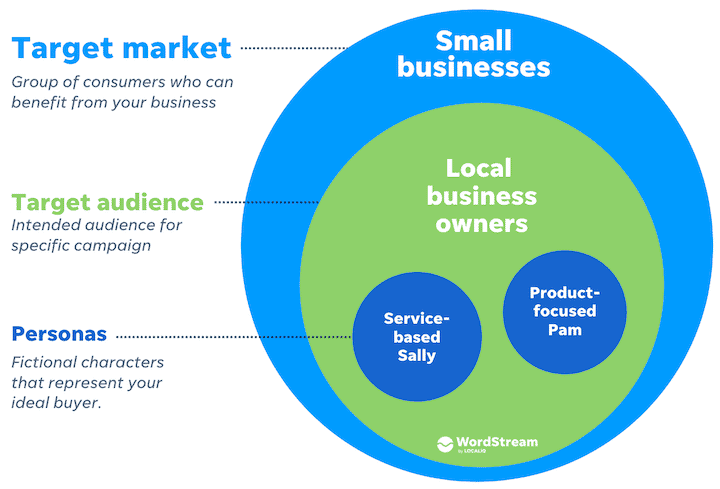

Source: Wordstream
The type of audience you’re catering to will dictate things like:
- The special features or integrations to look for in registration software
- What payment options you’ll offer
- Where to advertise your event
Now let’s take a look at some strategies you can use to reach the right people in the right way.
How Do You Find Your Target Audience?
We recommend starting by looking at your past attendees. Review your post-event surveys to determine if your most satisfied attendees shared any characteristics in common.
If you haven’t hosted an event before, no worries—you can also send a pre-event survey to your mailing list to ask them about their background, key demographics, and interests as it pertains to your brand.
Then, do a bit more research. Analyze your top competitors’ website copy and social media presence to find what kind of language they use and who their target audience tends to be.
This should give you a clue about what demographics might be the most interested in your event.
The more thorough your audience persona, the clearer your vision can be as you set up your event—and the more satisfying that event is likely to be to your attendees.
Compare Different Event Registration Software Tools
Next, do a bit of software window shopping.
There are several noteworthy event registration tools available, but not all of them will be a good fit for you. Consider the following criteria.
Pricing and Fee Structure
The fees involved in selling tickets can vary widely across platforms. Some might charge you a flat fee upfront, while others charge a percentage of each ticket sold.
Others may use a combination of percentage and a flat fee per ticket.
For instance, Regpack keeps pricing simple with a flat monthly fee for access to unlimited features, plus a 2.1% payment processing fee per ticket sold.
Payout Terms
Similarly, different registration tools handle payouts differently.
If constant cash flow is critical, you may not want to choose software that holds on to your ticketing revenue and only pays out at the end of the ticketing window.
Regpack offers customizable, automated billing and payment plans to ensure your cash flow fits your needs.
Ticketing Automation
The best registration software automates all of the work involved in selling tickets for you.
And since event registration can get complicated quickly, you’ll want software that can handle complexities like discount codes, capacity management, and multiple ticket tiers.
Built-in Marketing Features
The more integrated your marketing is with your registration page, the better.
The best tools have built-in marketing functionality like emails or social sharing buttons to help you get the word out about your event.
For example, Regpack’s email marketing tool lets you set up trigger-based communication to automate your promotional efforts. No more worrying about forgetting to send reminder emails!
Audience-Specific Considerations
And don’t forget to use the information you gathered about your target audience to inform your software choice.
For instance, if you know your target audience is young and tech-savvy, you’ll want software that lets users register on any device.
Or if your attendees will be coming from several countries, you’ll know to look for software that accepts multiple currencies.
Create an Account With Your Chosen Provider
Once you’ve picked a software tool to use, you’ll need to create a user account. With Regpack, you can start with a free 14-day trial to make sure our tool is the right fit for you.
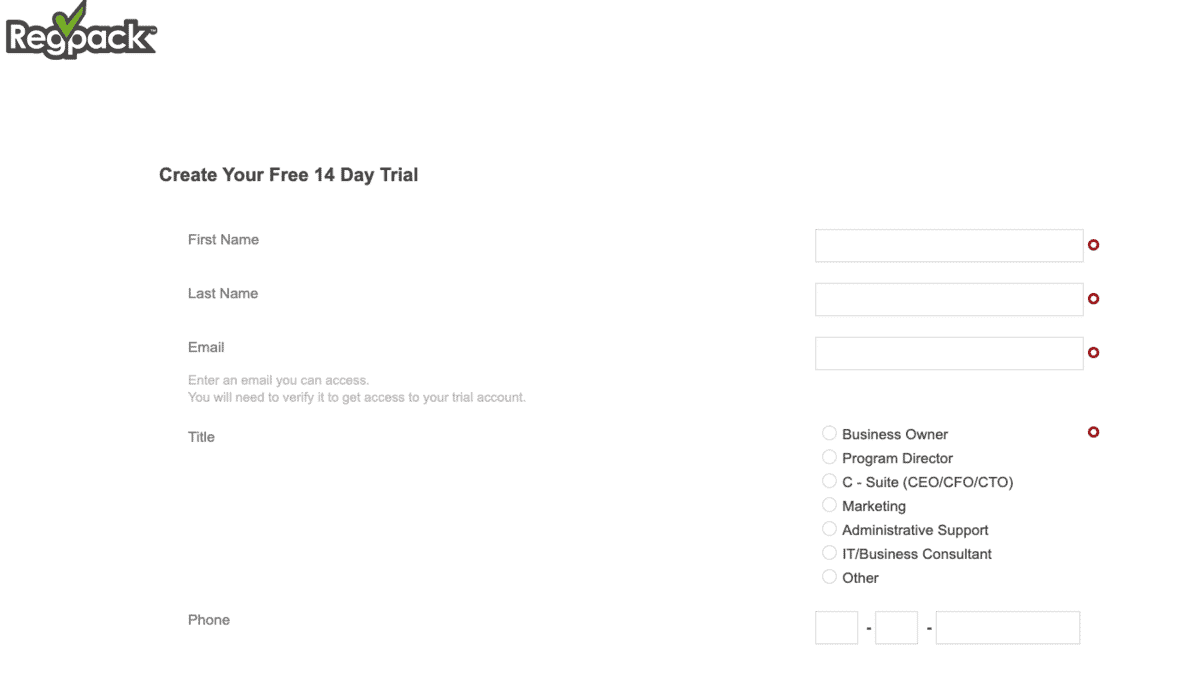

Source: Regpack
You’ll input your name, email, and title with your company.
You’ll also provide information like your phone number, the organization’s name and contact information, and what you’ll be using Regpack for (like event management or client billing).
Once you’re ready, click Next. Regpack will send you a verification email that you’ll need to click through to finish setting up your account.
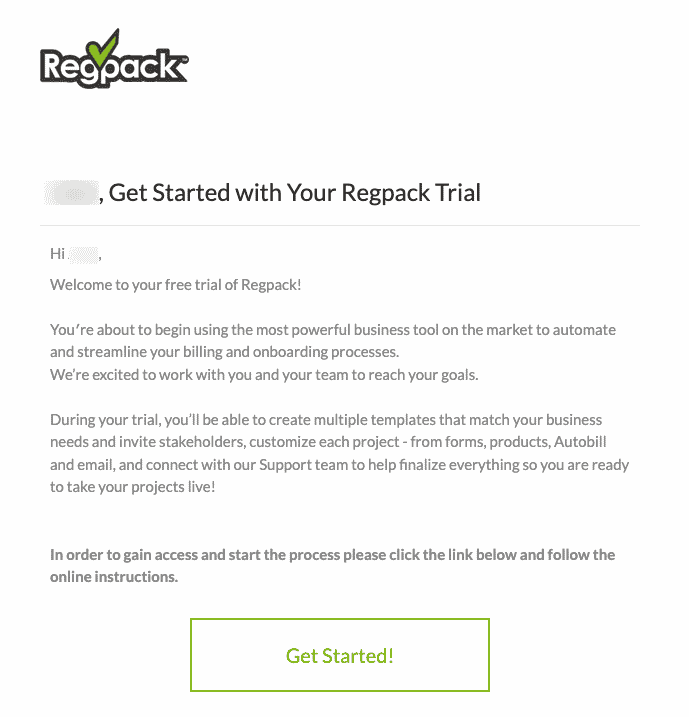

Source: Regpack
After clicking the link, you’ll be taken to this page to choose a password for your account. If you used a Google email to create the account, you also have the option to sign in with Google.
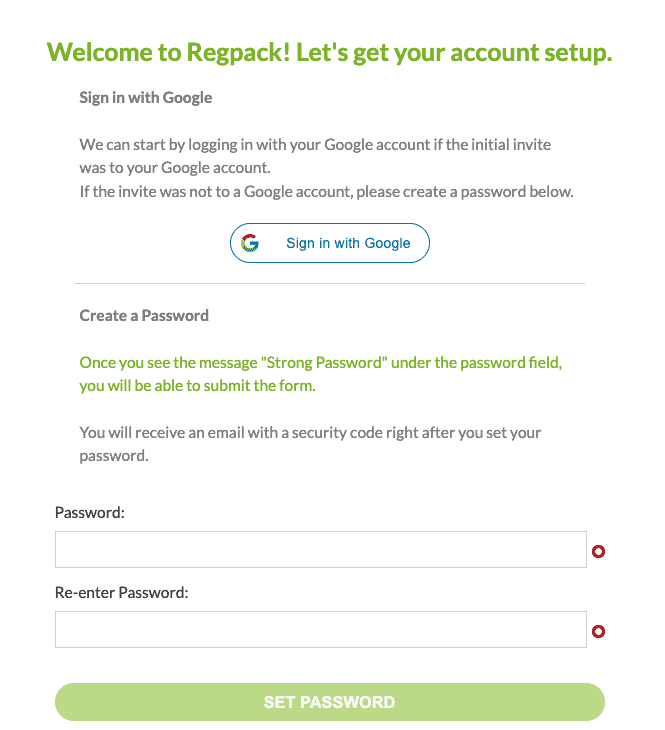

Source: Regpack
Once your account has been made, it’s time to create the event.
Set Up Your Event Project
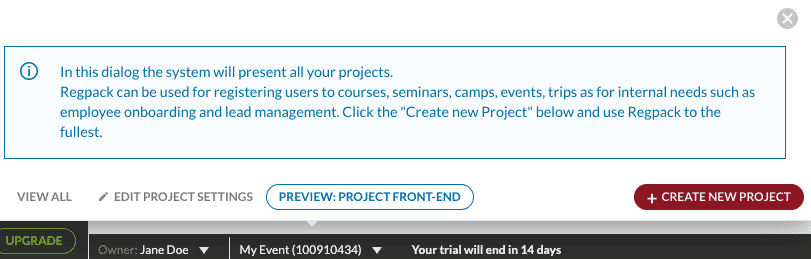
After setting up your new account with the event registration software of your choice, you’ll need to design the event itself.
With Regpack, you’ll be invited to create your first project immediately after creating your new user account.
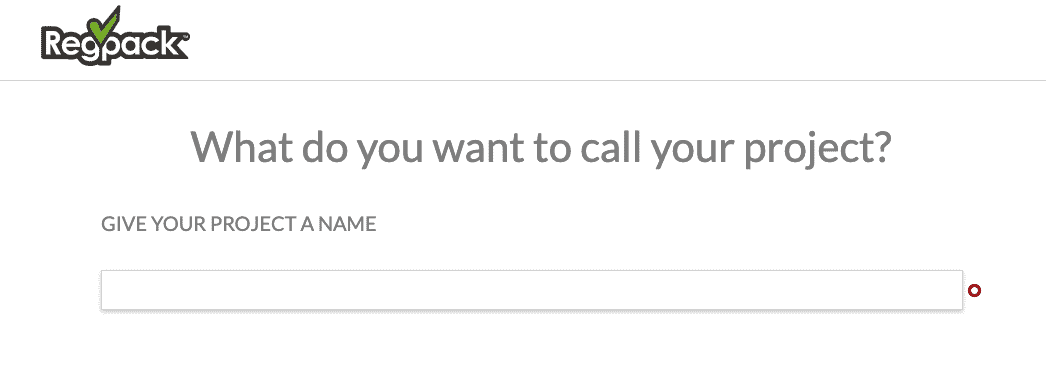

Source: Regpack
Creating a project means you’ll get an entire back-end dashboard to manage your event, from attendee forms, to an attendee database, to payment and billing management, and more.
Create and Customize Registration Forms
Start by heading to Settings and clicking Forms to create your registration flow. Each line item is a separate form.


Source: Regpack
Edit the forms by hovering over them and clicking edit field properties.
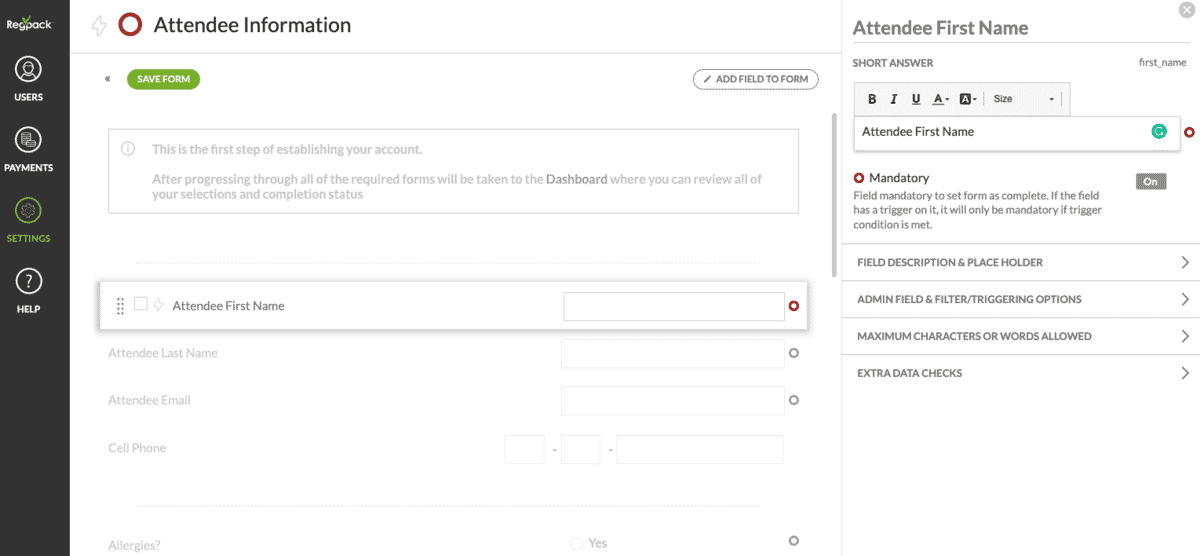

Source: Regpack
Regpack also lets you add triggers to certain fields, meaning they only appear when a condition has been met.
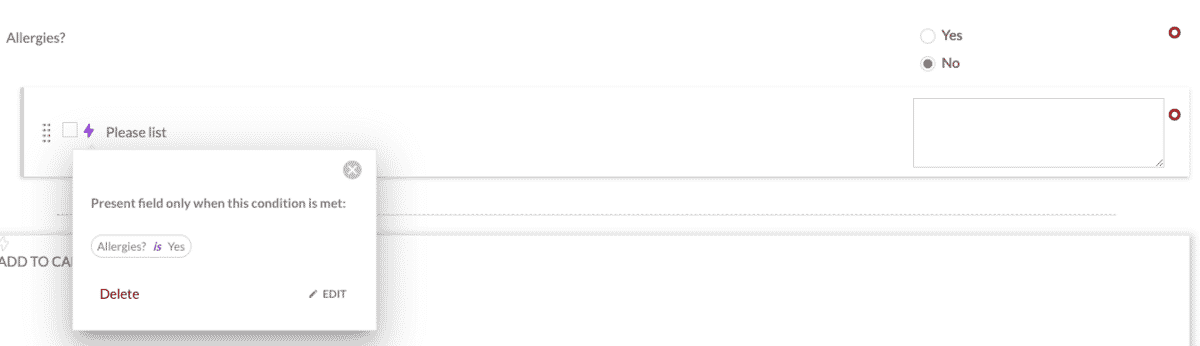

Source: Regpack
Triggers keep the registration flow running smoothly by eliminating irrelevant questions from registrants’ forms.
Define Event Details
To set up event details like dates, discounts, and related products, go to Settings and click Products.
On this page, you’ll be able to start from the provided templates to set up your event details.
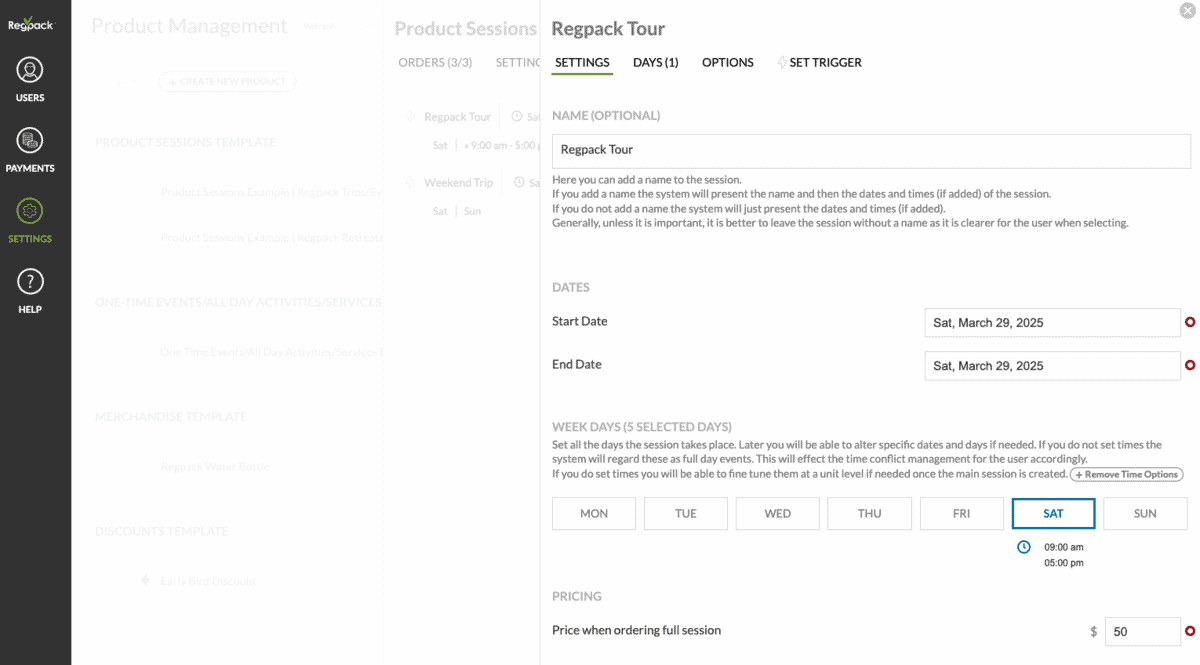

Source: Regpack
Name the event in a way that makes it clear to the audience what it’s about and make sure to be precise when you set the price, as well as the start and end times of the event.
Create Payment Options for Attendees
Next, set up auto-billing plans to make payments easy and reliable. Head to Settings and click Autobilling to add any number of payment plan options that your registrants can choose from.
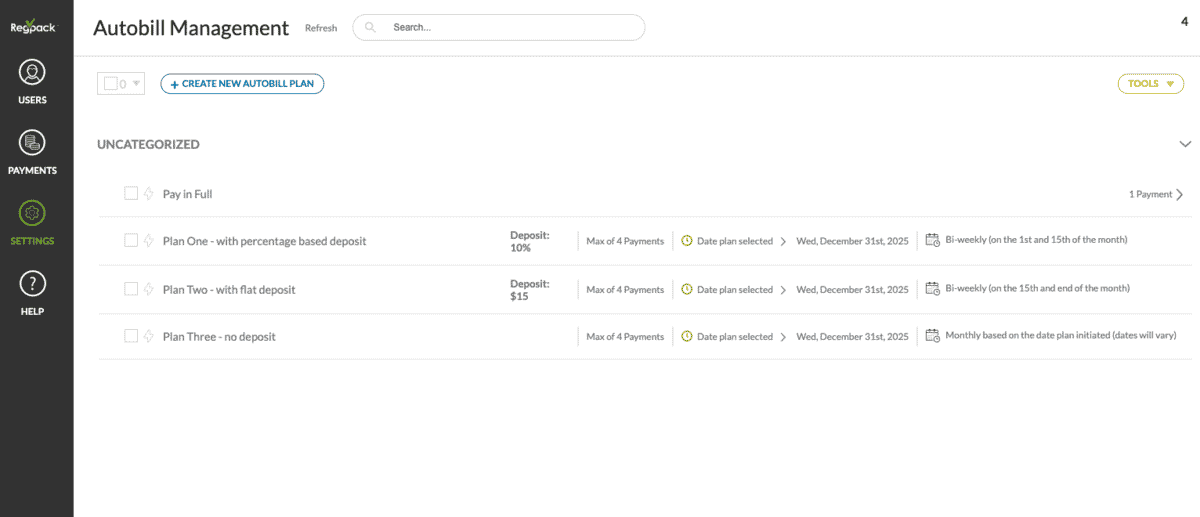

Source: Regpack
Having a variety of payment options makes registering more convenient for your future attendees.
Test the Registration Flow
Once you’ve customized your registration page to your satisfaction, don’t forget to test the registration process.
Find the link to test your project by clicking on your project name at the bottom of the page and clicking Preview: Project Front-End.

Source: Regpack
Complete several test registrations to understand the flow of your registration and make sure the elements are where you’re expecting them to be.
It’s much more difficult to make changes after your registration page is live, which is why it’s so important to test your registration flow thoroughly before launching.
Set Up Your Merchant Account
Next, make sure your system is ready to accept payments.
If you’re using Regpack, these settings can be found under Settings → Project Settings. Click the Payments tab, where you’ll be prompted to create a merchant account. 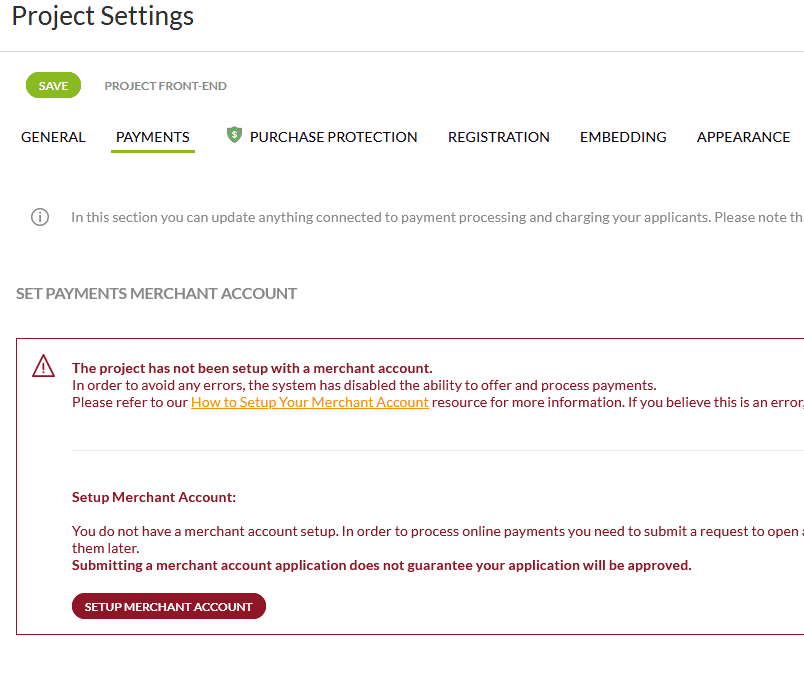

Source: Regpack
Click Setup Merchant Account to begin the application process. From this page, you can select your desired deposit schedule, payout currency, and refund settings.
It takes 1-5 business days to set up the merchant account.
The payments team will then submit a test payment into the account, and if it goes through, they’ll send you an email confirming that your system is now ready to accept live payments.
If you haven’t received an email, reach out to the payments team before taking your registration page live.
Beyond connecting your merchant account, the Payments tab is the place you can customize anything connected to payment processing and charging your applicants.
For instance, you can choose:
- The forms of payment you’ll accept
- The fee (if any) charged for credit transactions
- Whether to enable taxing
- The sender’s email for registration receipts
It’s also a good idea to double-check the financial contacts and make sure all relevant team members will get a notification if there’s a problem with a payment.


Source: Regpack
That will make it easier to manage all the payments.
Publish Your Event Page
When it’s ready, embed the registration page into your website. Regpack allows you to embed your registration system into any website with just a single line of code.
Click Settings → Project Settings → Embedding to copy and paste the HTML code into your website CMS where you want it to appear.
The iframe will adjust its width and height to match your website’s look and feel, creating a smooth experience for your users.
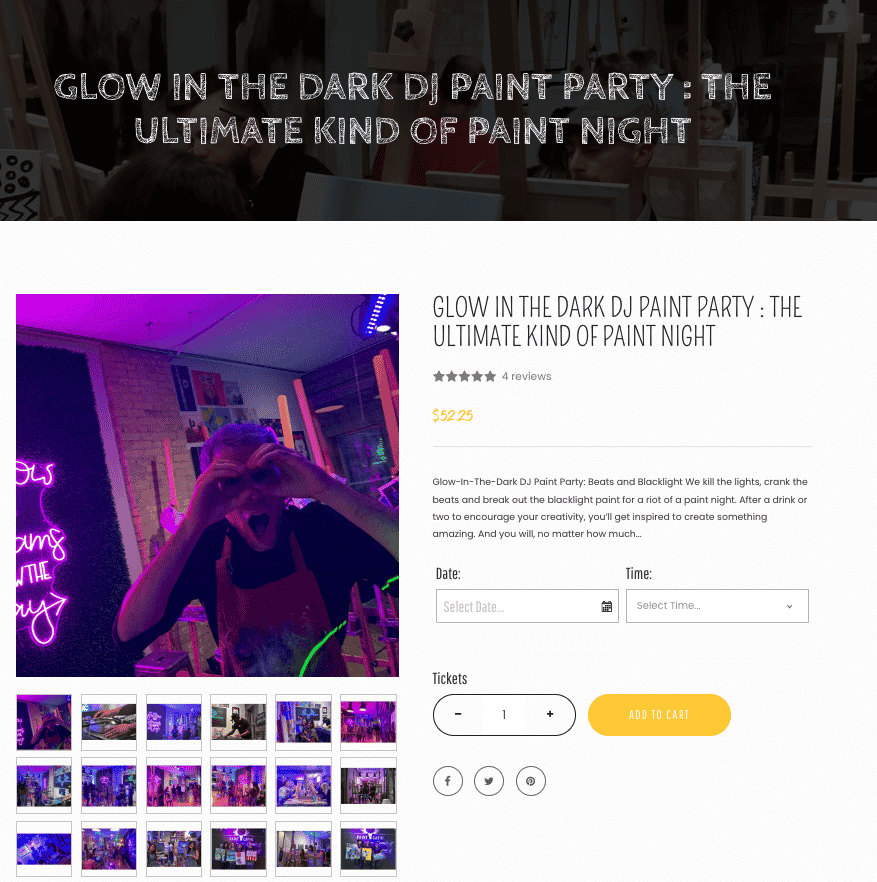
Keep in mind that your event page is more than a registration form; it’s a landing page that provides as much information as possible about the event—and convinces readers to take action and purchase a ticket.
Follow these best practices to optimize your event page for maximum event attendance.
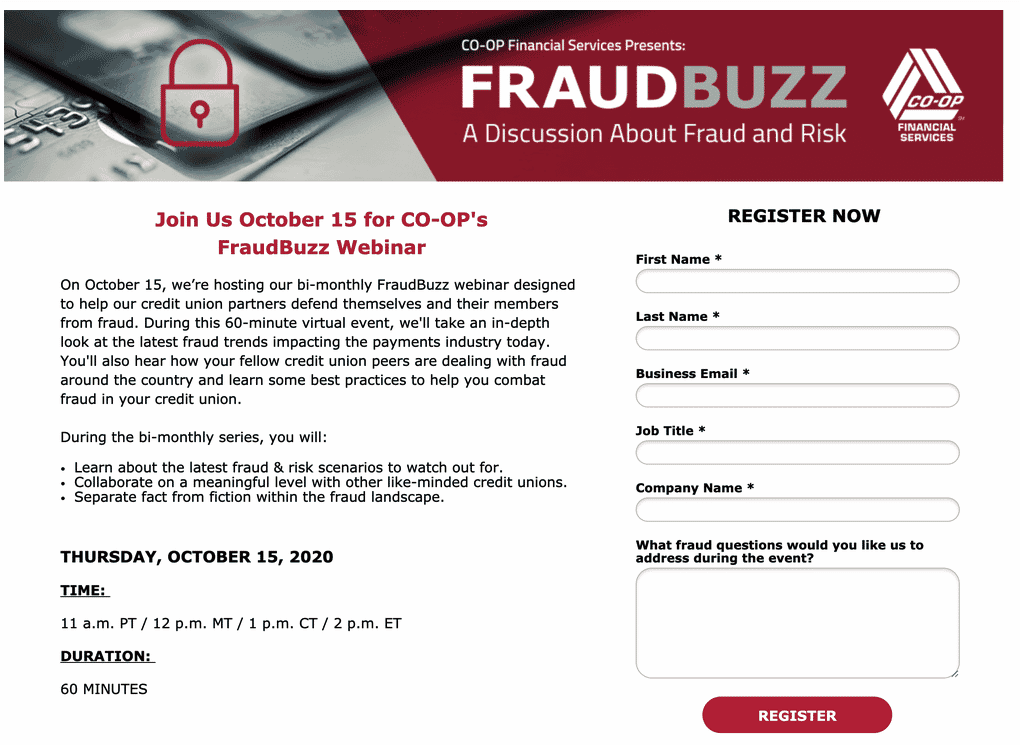
Write an Attention-Grabbing Headline
Readers won’t stay long on a page with a boring header. Try to incorporate urgency and value into your headline—and if you can add a unique twist or play on words, that’s even better.
Source: Paint Cabin

However, make sure that the bells and whistles don’t take away from the clarity of the message.
Include Detailed Information About Your Event
Don’t get caught up in the flash and spectacle of snappy copy, though—you still need to provide the facts.
If your site visitors can’t easily see the following facts at a glance, they’ll likely scroll away:
- What they’ll learn (or how they’ll benefit from the event)
- When the event is happening
- The time of the event
- The event’s location
And in the same vein, be sure to keep readability in mind as you craft your landing page copy.

Source: Unbounce
Use active voice and concise language—and break up the text with bullet points and small paragraphs whenever possible.
Use a Bold Call to Action (CTA)
No landing page is complete without the call to action. If you want visitors to sign up for your event, you need the CTA to be clear and prominent.
Use bold colors, make sure the button is easily visible, and don’t be afraid to get creative with the wording. Instead of the overused “Sign up,” try a more urgent “Register Now” or “Reserve my seat!”


Source: Seedprod
Promote Your Event
Once you’ve published your event page, you need to get as many eyes on it as possible.
That’s where event promotion comes in. There are a lot of channels available to you to get the word out, including:
- Social media (Facebook, LinkedIn, Twitter, Instagram, TikTok, etc.)
- Your email newsletter
- Physical flyers and mailers
- Announcing the event on relevant online forums and community boards
- Press releases
- Ticket giveaways and brand partnerships
The main thing to remember when promoting your event is to go where your target audience is.
If your ideal attendee spends most of their time on Pinterest and Facebook, it’ll be a waste of your marketing team’s time and resources to develop a promotional campaign for Twitter.
And no event marketing effort would be complete without gathering useful data for future campaigns.
Regpack offers pixel tracking that partners with Google Analytics to let you see where your registration page visitors are coming from—like a social media post, a link in their email, or a Google search.
Learning where your attendees began their registration journey can give you important insights into where to focus your promotion resources and efforts for next time.
You’re Ready to Set up an Event Registration Page!
To the non-tech-savvy, creating an event registration page can be daunting—but the process doesn’t have to be difficult.
We recommend starting by looking inward. Who is your target audience, and what kinds of features and integrations would they most benefit from in an event registration software?
Then, the easiest route to a hassle-free event registration page setup is to partner with the right software for you.
Choose one that automates the monotonous tasks involved in event management, such as ticketing and inventory management, payments and billing, data collection, as well as various reminders and follow-up emails.
If you’re ready to get started with Regpack, start your free trial today to see the many benefits for yourself!