
There is tons of information out there on the interwebs all about client onboarding, but none that are specific about APPLICANT onboarding. You generally find that you have a cool product – like a gadget or a fun app you want someone to download, so you reel them in, send them fun emails and get them to buy your product.
But what about onboarding applicants, such as attendees for your event, campers for your camp, students to your courses or volunteers for your amazing non-profit, etc, look like?
If you aren’t looking to make a sale, but to invest in an experience with your organization, what tricks are there to onboard these clients effectively?
This post focuses on what the onboarding process looks like for organizations registering people for their event or service.
It outlines the main steps everyone can follow to onboard registrants effectively, and how can you use your registration software to streamline the onboarding process and make it easy, intuitive and professional.
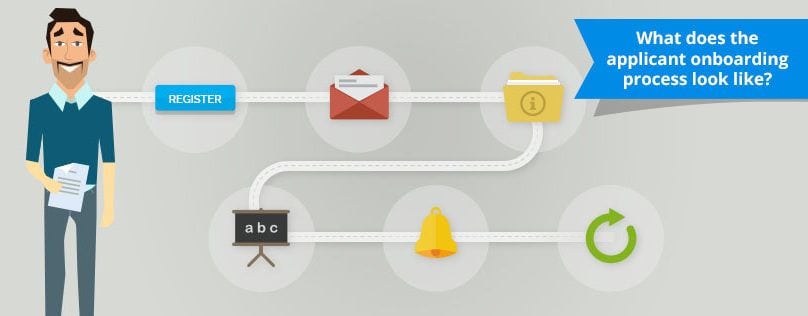
What does a general onboarding process look like?
When onboarding applicants, generally you have 6 main steps.
- Getting them to register.
- A welcome email after they begin registration.
- Information gathering – completing forms, etc.
- Educating the applicant about your business.
- Reminders and checking before the main event.
- Maintaining and continuing a relationship after your event or service is over.
Let’s take a look at each step on it’s own, and how can you get the most of your registration software to make onboarding applicants easy!
Step 1: Getting People to Register
This is the first step that needs to happen in the onboarding process. You might be asking yourself “isn’t this the actual onboarding? If they registered I onboarded them, no?”
Surprising as it might seem, getting people to your website and clicking the “Register Now” button is only the first step in the process. It does not guarantee they will become an applicant or a paying attendee or participant. It only states they are interested, nothing more. They are basically checking you out and the way you handle the process from here is what will determine if they will follow through all the way.
Getting them to click the “Register Now” button is out of the scope of this article. Just remember that if you are spending a lot of money and expending a lot of energy to get people to register, and you don’t follow through with the following onboarding steps, you’ve just wasted a lot of time and resources. Ouch!
Step 2: Welcome Email
Now that you got your applicant to hit the “Register” button, a welcome email should trigger when an applicant begins to fill in your forms. A welcome email could also trigger once they’ve completed registration, depending on the depth of your process.
Most people these days assume they will receive emails based on actions they complete on a website.
Case in point; when you buy something, you expect to get a confirmation email that the transaction went through. Or if you register for a new site, you aren’t surprised to receive a “welcome to our site” email.
Not only are these triggered messages great for connecting with your new applicants, it also serves as a confirmation to them that the actions they performed ‘worked’. Whether that means a payment went through or the initial registration was successful, they know it’s all good when they see that email come through.
An online application is no different. By sending a welcome email and confirming an applicant’s registration, you are demonstrating effective communication and taking out the guesswork for the applicant about whether their application was received.
This step is the first in ensuring you don’t lose applicants while onboarding them.
Below is an example of Rachel registering for this event. Once she begins the process, Rachel would receive this email in her inbox.
SUBJECT LINE: Welcome! Thank you for registering for YourSite!: Deposit Required!Hi Rachel,
We see you have started your registration. Just as a reminder you registered with the following email: youremail@gmail.com. You go back at any time to www.yoursite.com/register in order to view, alter and complete your registration.
Please note, a deposit in the amount of $150 is due in order to secure your spot. As you move through the registration process, you will be prompted on when and how to make this payment. To make this payment now, go here.
If you have any questions or need assistance with your registration, please know that we are here to help. Just give us a call or reply to this email and we will answer any questions.
We look forward to having you join us this year! It will be one of the best events you will ever experience!
Very best regards,
Melvin
melvin@yourwebsite.com
855-888-7655
www.yourwebsite.com
Register at: www.yourwebsite.com/register
A few notes about this email:
– Note how you you are giving the applicant a reminder of the email they used to register. Many people have multiple email addresses and they might forget which one they used for your registration. It’s always nice to have this sitting in their inbox for reference when they want to login later, so they don’t bug you for the information!
-The URL of the registration process is right in the email so they do not need to hunt it down if they want to see their registration status or continue the process, make a payment, etc. If you omit it most chances are they will go to Google and do a search in order to find you. For some people that will be another chance to check out the competition and maybe opt not to register with you in the end.
-The mandatory stage that needs to be done is stated clearly in the email so they know what they really must do in order to secure their place. In advance registration systems you will be able to trigger the email at different stages of the process so that people that have paid their deposit will get a different email than people that stopped in the middle. This type of customization is crucial for effective onboarding, so make sure your registration software can do this!
-A small but important detail is in the sentence “Reply to this email”. Make sure the email is coming from an email address that is connected to your organization and that is monitored so people can just hit “reply” if they have a question or a problem. This shows you are client facing and in addition will make sure you get to take care of issues immediately. This is good for customer service, and client retention!
-Finally notice the email signature. It includes contact information so that they have everything handy if they need to contact you!
Step 3: Confirmation of Registration
An extension of the welcome process is a confirmation of registration. Sometimes the welcome email and confirmation are rolled into one. In this case, Abe is receiving a confirmation that he registered for a specific event and the payment for the event is also included.
This email serves as a great ticket alternative to show as proof of registration and payment, and gives an overview of the actions Abe performed – selected a specific event, paid the fees. Depending on the length of your process, this email is all that is needed.
SUBJECT LINE: Thank you for Registering for the 2016 Yay Conference: Payment Processed
Hello Abe,Thank you for registering for the 2016 Yay Conference! We look forward to welcoming you this summer. Please print this invoice for your records.
You payment was processed in the amount of: $300
You are confirmed for:
Friday | Cocktails & Dinner
1
$100
Paid
Conference Registration Fee
No meals
1
$200
Paid
If you have any questions or concerns, please don’t hesitate to contact us at info@conference.org or reply directly to this email.
Best,
James
Conference Director
888-888-8888; info@conference.com
Step 4: Education and Information Gathering: Send triggered emails when applicants reach certain points in your onboarding process.
These types of emails are a key part of your onboarding process, as they encourage applicants at specific points in the process to complete important action items. This can include:
- Completing registration forms (forms that were marked incomplete).
- Payment Reminders
- Payment Invoices
- Notification of payment made.
- Upcoming event reminders.
A great registration software should allow these emails to be triggered when the action happens and populated with personal information. This is especially important for payment emails so the applicant can get everything they need from the message without logging in to view details.
This might include their updated balance, previous payments, etc. Personalized messages also ensure the applicant reads the email, since it is clear the message is just for them and not a bulk email that they might ignore.
Below you’ll see an example of a payment acknowledgement to Jimmy. It’s always a great idea to immediately send a notice of receipt of payment, since most people these days expect to get a confirmation when they spend money.
The email not only provides an invoice, but also confirms the action taken, which gives the applicant peace of mind.
You’ll see that this email includes Jimmy’s updated balance. In this case it’s $0, but if there was still a balance due, the email is a great way to also notify the applicant that more money is due, and give an option to pay it ASAP.
Notice there is also a direct link to view account and payment history. So if Jimmy wanted to make a payment to close his balance, he can easily do that via this email.
SUBJECT LINE: Payment Received for WoW Event
Hi Jimmy,Your payment $100 for WoW Event on December 1, 2016, has been received.
Your remaining balance due is $0.
You can log into your registration HERE to view your payment history and application details.
If you have any questions or need assistance, please feel free to contact us. We look forward to seeing you next month!
Very Best Regards,
Samuel
Event Coordinator
888-888-8888; info@sam@event.com
Step 5: Reminder and Check-In Emails: Reminders when applicants are approaching payment due dates, invoices sent after payments processed, reminders as due dates or event dates get closer.
Information gathering emails are great for applicants who are paying on time, but sometimes you have to remind an applicant that they have a payment due or nudge an applicant to complete outstanding action items.
Here is a great source for how to put together payment request emails, which goes more in depth than this post will. Reminder emails, especially automated through your software, are a great time saver on the admin side of things.
Instead of chasing down applicants individually, you can easily filter who is missing a payment or form, and target those people directly and personally through the system, to keep registration on track.
If you have an event or specific time and date of your program that the applicant is registered for, it’s also great to send emails to your applicants to confirm their attendance on a certain time, time and location for what they’ve registered for. This serves to also remind them as the date of the event is closer that it’s coming up.
A great software will let you add “tokens” to your emails so you can create one template, but have the email go out to only those who need to receive it. This means you can filter who is attending a specific event, which ones have outstanding payments vs. those you don’t – so you can send an email that is relevant to each applicant.
SUBJECT LINE: Event Reminder: January 10, 2017 Wine Tasting!
Hi Jill,We wanted to send a reminder about the Wine Tasting event you are scheduled to attend on January 10, 2017 at 5pm and 1212 Main Street Oakland, CA.
We look forward to seeing you there!
If you have any questions, please email us back or call at 888-777-7777.
We see your registration is complete and your balance paid in full! Thanks!
Best,
The Event Team
888-777-7777
info@winetasting.com
Step 6: Maintaining the Applicant Relationship: Email updates and newsletter, marketing new products and events to clients, periodic follow-up, etc.
There is a great in-depth post here all about using your registration software as a sales platform. I won’t get into too much detail here about all the ways to use your registration software as a sales software here. But, your onboarding process doesn’t stop when you get a new client and they attend the program or event they originally signed up for.
If you offer more programs that they will be interested in, use the fact that you have their contact information and your software, to send marketing emails and follow up after the original event is over.
You can send an email to fill out a post-event survey, or just let them know that the event they attended in 2016 is repeating again in 2017, etc.
Remarketing is big in the marketing world, but many ‘average’ businesses who don’t do full on marketing forget this is an option and miss out on the opportunity to convert past clients again and again. Don’t make this mistake!
Below Rebecca’s son Joseph attended Awesome Camp last year. Awesome Camp wants to let Rebecca know there is another session of the same camp this coming summer, and some awesome early registration deals to take advantage of!
SUBJECT LINE: Get ready for Awesome Camp 2017! Book Now and Get up to $300 Off!
Hi Rebecca,We had so much fun with Joseph last summer at Awesome Camp, and we are looking forward to seeing him again next summer!
Just a head’s up we are running some awesome registration deals for Summer 2017!
If you register on BLACK FRIDAY, get $100 your first session and $200 a second session.
Enter code: BLACKFRIDAY once you login to your account.
If you register before January 1, 2017 we’re offering 10% off all sessions booked! Enter code: NEWYEAR to grab the deal.
You can login here. Your login is the email we sent this message to.You can click the “Forgot password” button if you need help logging in! Get all the session dates and details on our website!
We hope to spend another awesome summer together! If you have any questions, please reply to this email!
Best,
Michael
Awesome Summer Camp Director
mike@awesomecamp.com
888-888-8888
Conclusion: Using Your Registration Software to Onboard Applicants
Being successful in business is all about using the right tools to help you do your best work. Often times we don’t put together registration and sales in the same category, especially when you look at the process of onboarding new attendees or participants.
The goal of this post was to illustrate how one registration software can serve the entire onboarding process. From the initial signing up, managing form completion and payments, updates and reminders for upcoming events, and even for further marketing after the event has closed.
If you look at your onboarding process in this way, you can use the tools of your registration software much more effectively to provide excellent service, a smooth onboarding process and great marketing all the way through!