

When you create or adopt a repeatable, effective, and partially automated customer billing process, you’ll get paid faster while spending less time doing those tedious administrative tasks.
That leaves more time in your busy day to focus on core job functions, billing and payment analysis, and business strategy and forecasting.
In this article, we’ll walk you through a step-by-step process that service-based businesses, from freelancers to large organizations, can follow for optimal cash flow and financial success.
- Gather Source Documents
- Review Your Billing Information
- Generate the Invoice
- Send Out the Invoice
- File a Copy of the Invoice
- Enter the Sales Information Into the Sales Ledger
- Conclusion
Gather Source Documents
Start your billing process by gathering source documents that prove your sales occurred, like purchase orders, package slips, sales invoices, and credit card receipts.
Regardless of its form, a proof of sales document should include the following:
| The date the sale took place |
| Your customer’s name, address, and phone number |
| The item or service sold |
| The quantity sold |
| The price of each item or service |
| Any sales tax collected and the subtotal |
Your proof of sales documents are essentially contracts that enforce your right to collect payment from your customers for services or items they bought on credit.
This documentation can come in handy in many circumstances.
For example, if a client is refusing to pay because they believe they never bought your service, you can show them the proof of sales documents to jog their memory.
If that doesn’t work and you choose to take legal action, the documents will become evidence in your case.
Below is an example of a purchase order (PO), mainly used by B2B sellers, from SkuVault’s article on the difference between purchasing orders and packing slips:
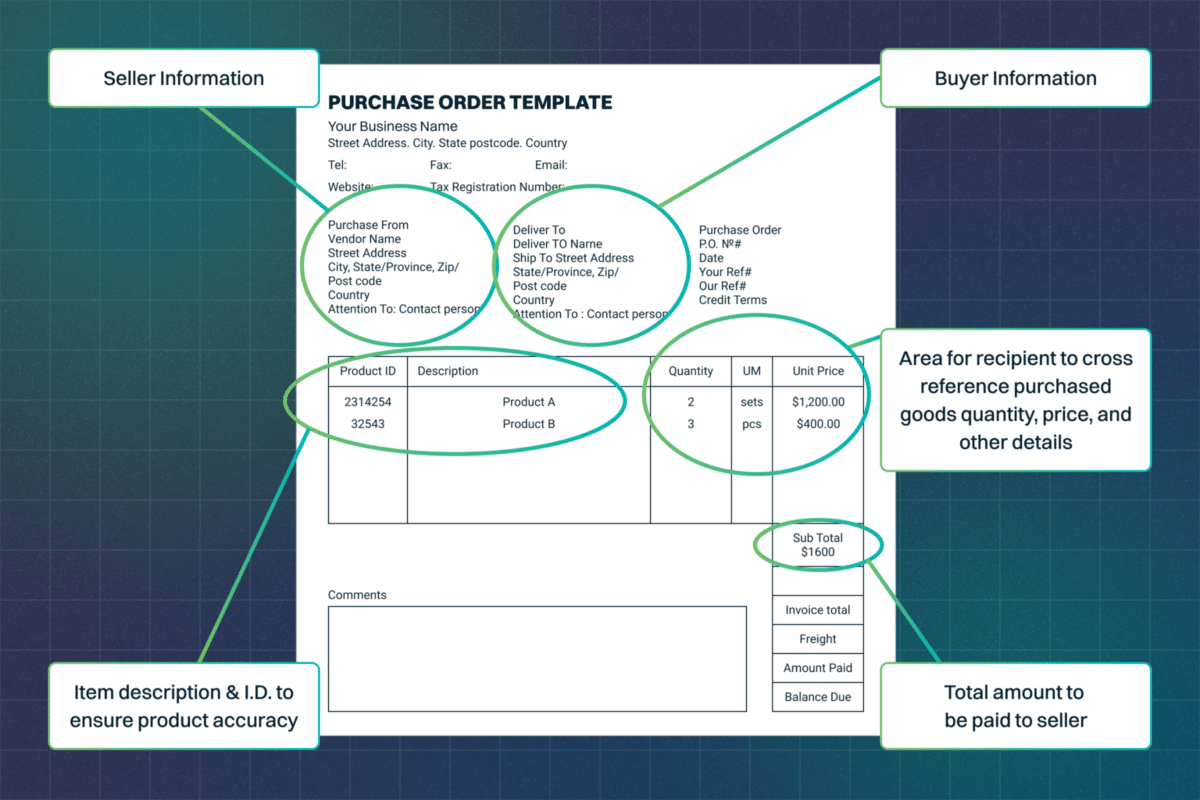
Image via SkuVault
In a PO, it’s a good idea to also include your company information, as done above.
Websites like Template Lab offer templates you can use to create purchase orders and other proof of sale documents.
Now that you’ve collected and looked over your proof of sale documents, you know who you have to invoice, what they purchased, and how much they owe.
This will come in handy when creating your invoice.
Review Your Billing Information
Billing information is any data that helps you access a customer’s account.
It could be a credit card, debit card, checking account, savings account, or some other way in which the customer can fulfill their obligation to pay for your service.
Early in the business relationship, it’s important to get as much information regarding billing as possible from your customer, including the name of the person in charge of paying the bills and their contact information, billing address, shipping address, and email address.
That way, when you create the invoice you’ll know what name and address to include and how to ensure it lands in the hands, or inbox, of the right person, instead of getting lost in the ether.
You’ll also know their preferred method of payment.
Additionally, you should also check over your own company’s billing information.
Make sure that your payment details, such as your bank account information or PayPal account name, billing address, name, and contact info, are clearly written out so the customer can easily pay you after receiving the invoice.
To make it even easier on them, many businesses offer multiple payment methods, which they make clear on their invoices, as done at the bottom of this example from Quickbooks:
Source: Quickbooks
If you’re being paid by check, for example, remember that your address needs to list the name of the business, street address, city, state, and zip code in order for the client to mail you the payment.
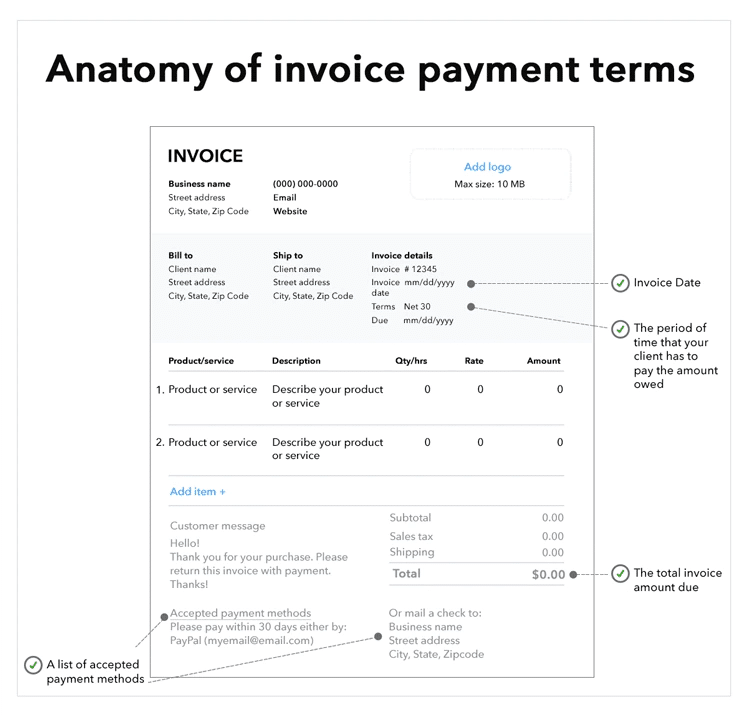
Generate the Invoice
Next, it’s time to create the invoice that you’ll send to customers.
There is some specific information all invoices should have, ensuring that the customers know what they’re being charged for and pay promptly without question:
Invoice Checklist
| Unique Identification Number | This is a number that helps you organize your records and avoid creating duplicate invoices—e.g., Invoice #0012. |
| Company Name & Information | Write the names, addresses, and contact details for both your buyer’s company and yours. |
| Description of Goods or Services | Clearly explain the item your client purchased. Be specific. “Basketball Summer Camp: May 5-17” is better than just “summer camp.” |
| Relevant Dates | The date you delivered the service or good and the date you created the invoice. |
| Money Owed | Calculate the total your customer owes, including any fees or discounts. |
| Payment Terms | This includes the number of days in which you expect to be paid and the method(s) of payment. |
Creating invoices is much easier with a reusable, pre-formatted invoice template that just requires you to fill in details specific to the customer.
Using templates, you can generate a clean and effective invoice in just a few minutes.
Plus, a template will also ensure that you don’t forget to include any important information, since the fields are there for you to fill out.
Billing automation of any sort keeps you from making costly billing mistakes.
There are many tools out there offering templates. Most, like PayPal, even warn you if you’ve forgotten to fill out a section, as shown below:
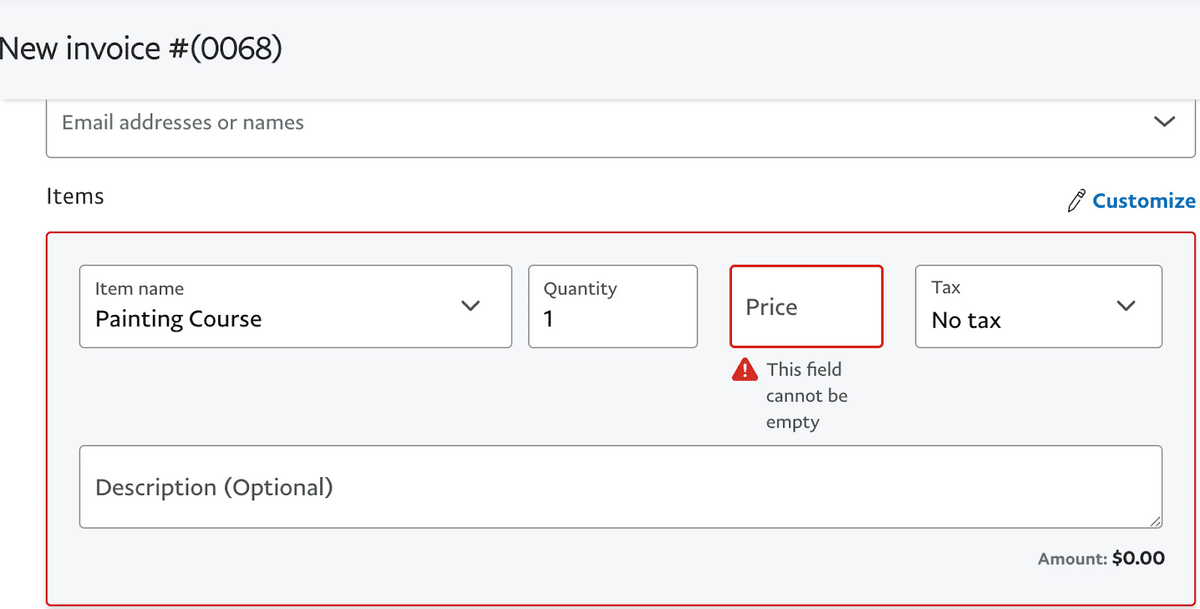
Source: PayPal
Many invoicing template software will also let you easily customize your invoicing templates so that they look more professional, which will help you gain credibility as a business and respect from your buyers.
Just look at the difference a little tailoring makes to the invoice:
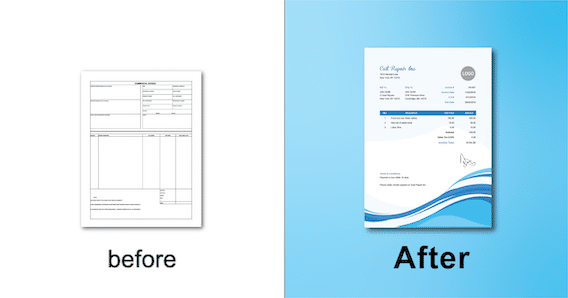
Source: Invoice Home
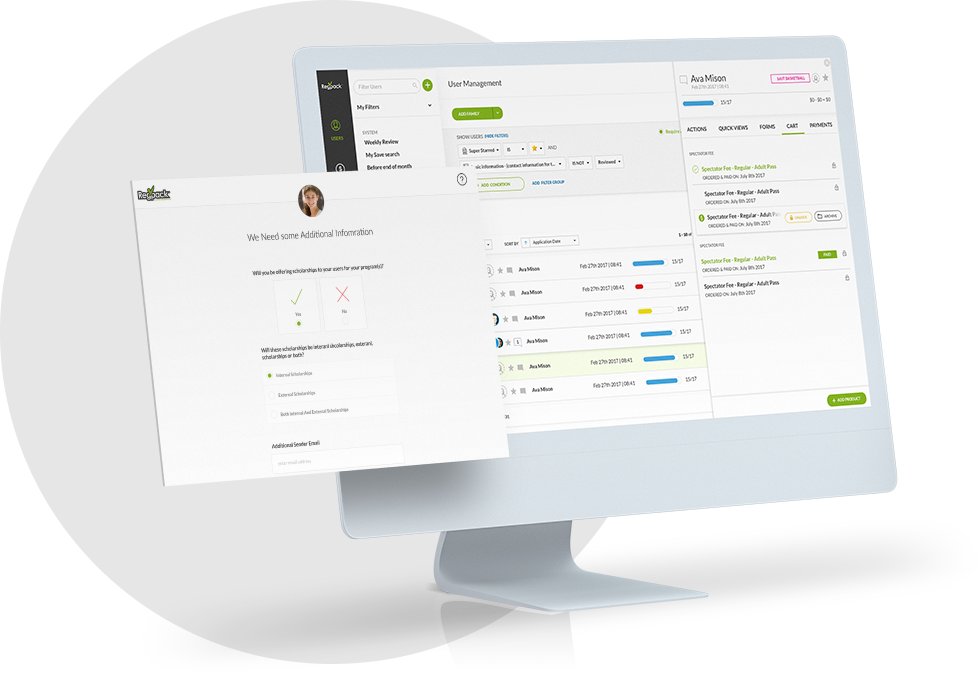
If you’re a service-based business looking for an easy and automated way to bill your clients, check out Regpacks, which not only provides invoice templates, but also enables you to set up personalized online payment plans for each customer, thereby improving their experience and saving you time:
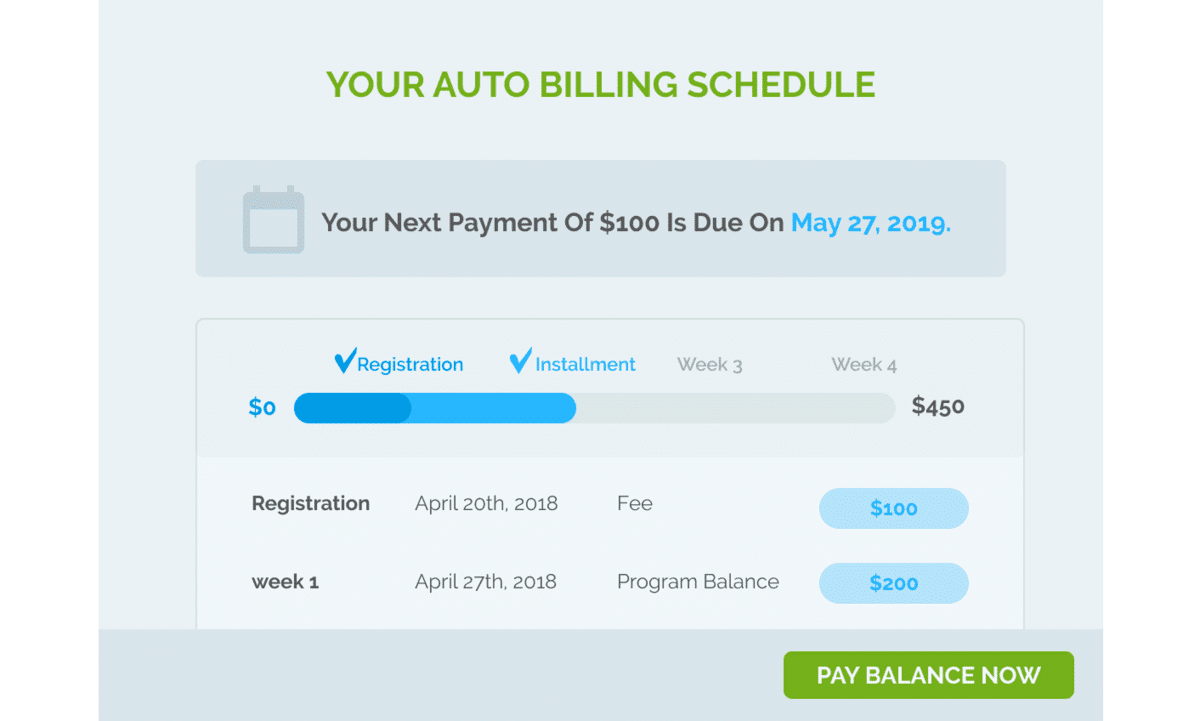
Source: Regpack
Of the many billing tips we can offer, one of the simplest to implement is to write a thank you note on your invoice, such as “thanks for doing business with us” or “we appreciate the prompt payment!”
When your clients feel like you value them as customers, they’ll be more likely to pay you quickly.
Send Out the Invoice
As soon as possible, send out your invoice, but keep in mind that it’s best to avoid printing the invoice and mailing or faxing it to your customer.
There are too many steps involved and it eats away at your precious time.
Instead, it’s better to rely on online methods.
For instance, email invoicing is a step up. In this method, the invoice is usually sent as an attachment in the email itself.
If you go this route, be sure to use a subject line that indicates this is an invoice email so that your client opens and prioritizes it.
Using email is a suitable option for smaller businesses working with a few customers.
But once you start growing, it’s important to start looking for more effective methods for managing your invoices.
Invoicing software is just such a method, as it offers numerous helpful features that email invoicing doesn’t.
These tools can do things like track the status of the invoice, so that you can stay on top of payments, as shown below in the tool Invoice2go:
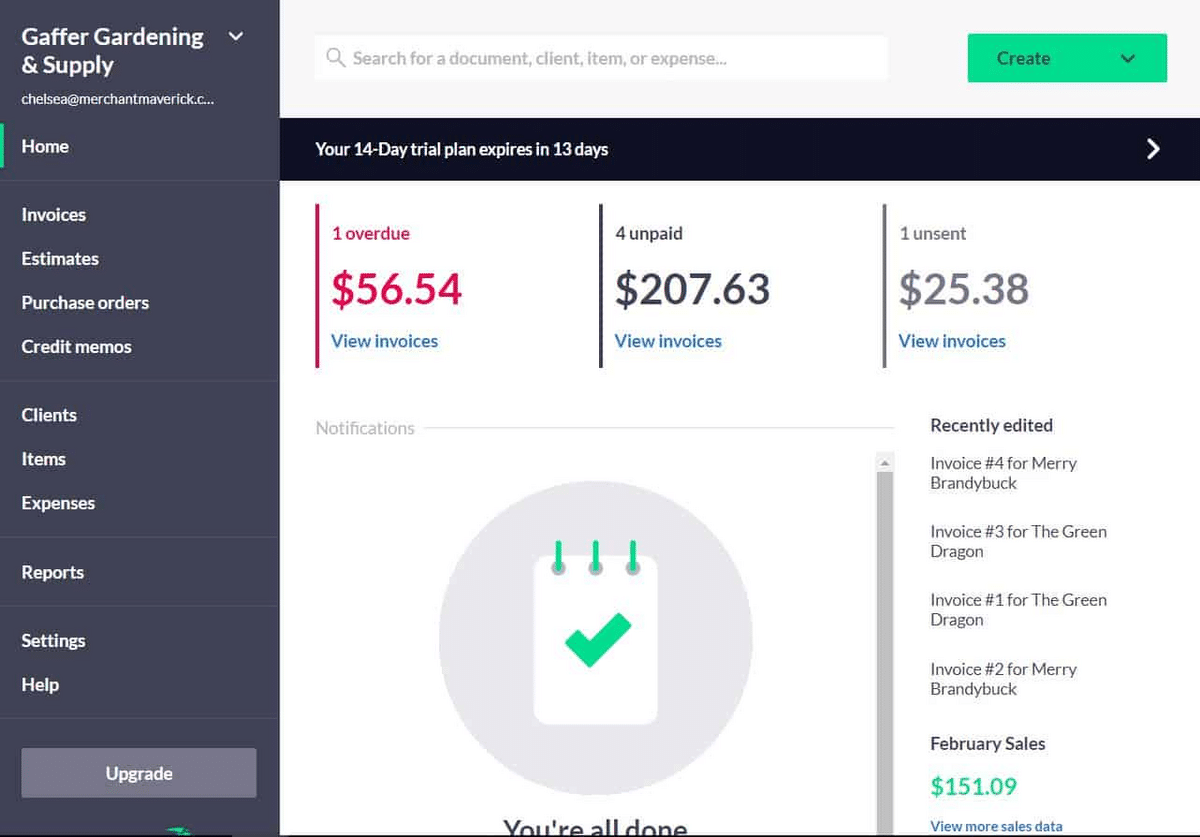
Source: Merchant Maverick
Most invoicing software will also remind you when invoices are overdue or enable you to pre-schedule them to send out at specific dates, hence automating your administrative work.
Further, these tools often give clients the ability to pay directly on the invoice using different payment methods. This reduces friction.
Even if you’re invoicing through a software platform, it’s still common courtesy to send the client an email alerting them of the invoice and asking them to confirm its receipt.
When you do this, they’ll get two alerts, increasing the chances of them seeing it and paying quickly.
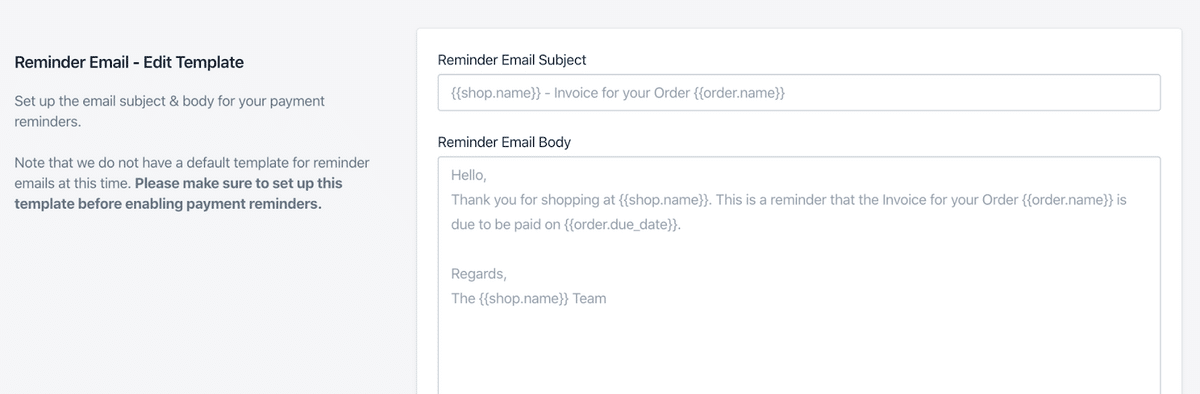
If they don’t respond to your email, consider sending a polite follow-up email two days later. And if it’s the due date and they still haven’t paid you, you can send another.
Consider creating follow-up email templates like the one below for quick turnout:
Source: Invoice Falcon
Sending the invoice is only one part of this process. You now need to follow up consistently to influence action from your clients, who might push paying to the last minute.
File a Copy of the Invoice
Saving your invoices can help your business in many ways, from enabling you to better predict cash flow and create marketing strategies to protecting your business during IRS audits and lawsuits.
How Saving Invoices Helps Your Business
| Bookkeeping | Analyze your invoices to assess the financial health of your business and predict future cash flow and profits. |
| Taxes | The IRS recommends that small businesses keep records of their invoices. They can help you defend yourself in case of an audit. |
| Lawsuits | Invoices include details about the timeline, price, and the work delivered, making them useful for legal protection. |
| Marketing | You can analyze your invoice history to find common times of high sales and then create marketing strategies to take advantage of these periods of increased demand. |
It’s important to file a copy of your invoices somewhere you can quickly find them, preferably online in an invoicing tool or a cloud-based software application.
This should save you and your team time, since the average employee spends four weeks per year looking for paperwork.
Most quality invoicing software will have document storage functionality and provide a searchable, filterable, database you can easily navigate to find and report on invoices when you need them.
You should also be able to access your documents on the go from your mobile device, like you can with Invoice Simple:
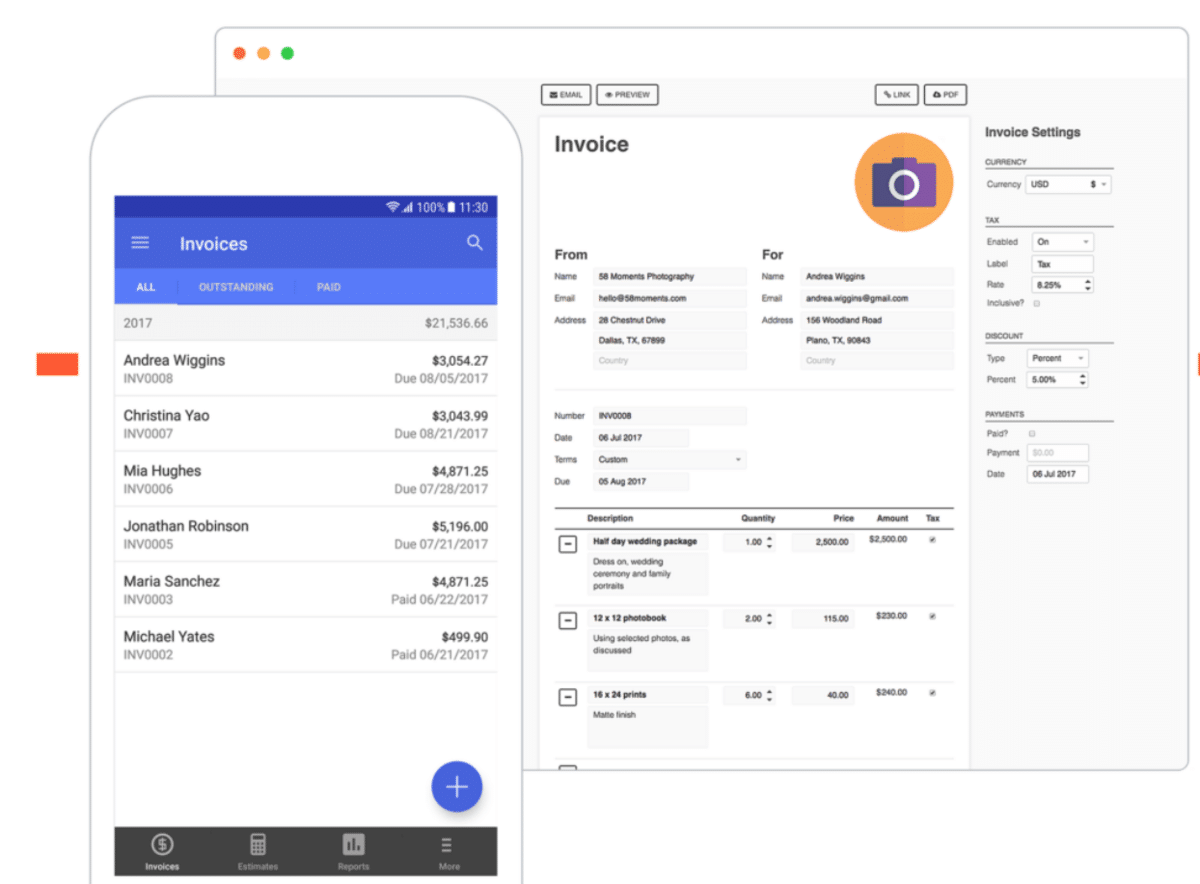
Source: Invoice Simple
If you’re still using paper invoices, consider changing to online storage to reduce admin costs.
But, in the meantime, stay organized by creating a marked folder that holds only your invoices, and place it in a drawer, file cabinet, or safety vault where you can easily retrieve it.
In short, saving your invoices can help you in a pinch in the future and enable you to run analyses that provide you with insights to better run your business.
Enter the Sales Information Into the Sales Ledger
A sales ledger is a chronologically-organized, itemized list of the sales your business has made.
It documents sales you have and haven’t received payment for.
Entering the information into a ledger after sending an invoice is a great way to stay organized during billing and accounting activities, like managing accounts receivable.
Below is an example of a sales ledger:
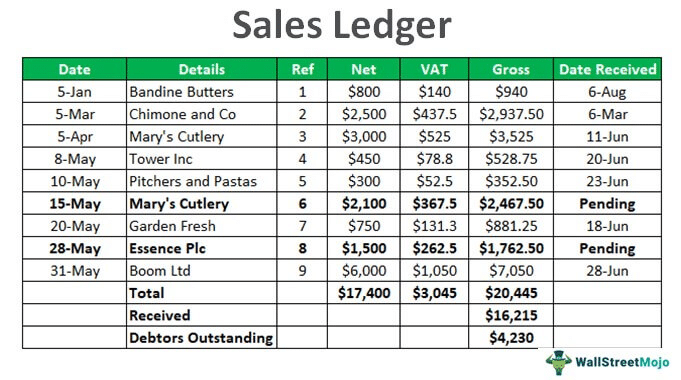
Source: WallStreetMojo
The above example includes columns you’ll often find in a sales ledger, including the date, details of the buyer, a reference number, revenue information, and invoice payment tracking.
The “VAT” in one of the columns stands for value-added tax, whereas Gross is the VAT+the Net revenue from each sale.
It also bolds sales that have outstanding invoices, a good technique for staying on top of payments.
It also has a section at the bottom calculating the total gross revenue earned and received, and the due outstanding.
A basic ledger like this should make it easy to track your sales and accounts receivable. You can also easily transfer the data into your general ledger and accounting system.
It’s best to update your sales ledger once a day at a specific time so that you don’t forget to list any transactions.
Consider selecting a regular time during the end of the workday when you’ve finished the hard work and can dedicate a few minutes to this short yet important task.
Conclusion
When you bill your customers properly, using a standardized and effective process, you’ll improve not only your cash flow, but also your relationships with your customers.
They’ll appreciate the consistency and professionalism of your approach.
And if you go further and personalize payment plans and billing to meet each individual customer’s needs with a tool like Regpacks, you’ll receive even more referrals and purchases from your customer base.